
How to photograph sand dunes
Sand dunes are some of landscape photography’s most unique and photogenic subjects. Windswept dunes provide an endless supply of gracefully curving lines, fascinating patterns, and complex layers and shadows, all essential for compelling landscape photos.
Photographing dunes presents unique challenges. Here are some tips for making the most of your next photography outing in the dunes.
Move around to find lines and curves
A field of sand dunes is visually stunning but can also be overwhelming, and photographers may struggle to pick out the best scenes.
The most exciting dune photos often come from getting up into the sand. As you wander the dunes, watch how the lines and curves change and converge depending on your vantage point. Moving left and right, even in small amounts, can change your composition dramatically. The same thing applies to changing your elevation.
While you evaluate potential scenes, be careful where you walk. Footprints quickly ruin pristine lines and patterns in the sand. Avoid trampling the areas you intend to photograph.
If photographing with a group, be considerate of others. You may find a great composition and await the light, but your friend may stomp along the ridge you hoped to photograph. Open and polite communication can help avoid these misunderstandings.

There is sometimes nothing you can do about footprints at popular dune locations. Other visitors have the right to enjoy the dunes, just as you do. Sometimes, a polite request to avoid an area you hope to photograph can keep all parties happy. If the dunes are littered with footprints, take advantage of them as another type of pattern or leading line.

Walking in sand is difficult
Climbing dunes requires a lot of effort and time. Every step requires almost double the energy as the soft sand gives way to your steps. It can be exhausting to traverse dunes. Allow extra time to reach and evaluate your photo locations.
Wait for shadows
Sand dune photographs benefit tremendously from shadows and contrast. The juxtaposition of the brightly-lit face of the dunes against deep shadows on the other side makes the most compelling photographs.
The optimal time for photographing dunes is sunrise and sunset, when the sun’s angle is low, casting long shadows. Subtle lines before sunrise become dramatic lines once the sun hits them. But the window of time for these shadows is relatively short, as the sun rises and begins to light the dunes evenly.
The other advantage of photographing during sunrise and sunset is that the light casts a golden color, enhancing the dune’s color.


Experiment with focal length
There is no optimal focal length for dune photography. We use anything from super-wide-angle 14mm lenses to telephoto 200mm lenses. We’ve even used 500mm super-telephoto lenses to pick out dune scenes from a distance. Remember, if photographing with a telephoto lens at close range, you may have to focus stack your images to keep everything in the scene sharp.
Add other elements
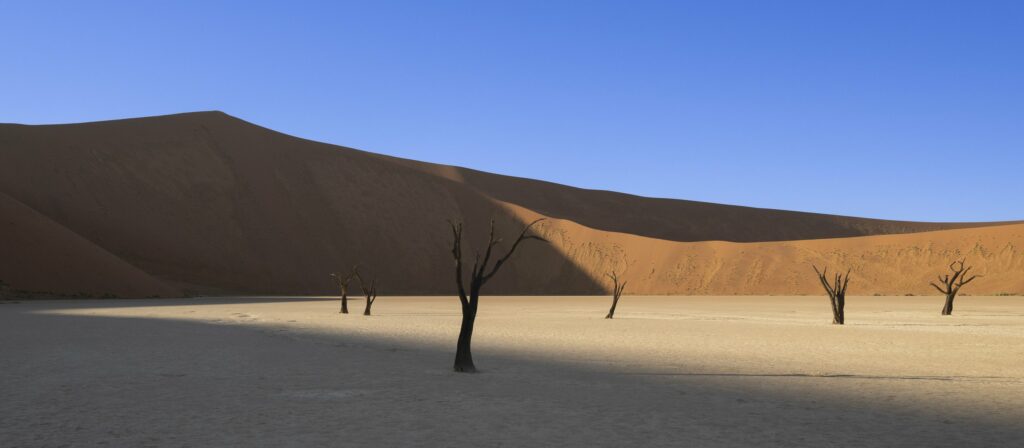
Some dunes have compelling foreground elements, like the iconic camelthorn trees in Namibia.
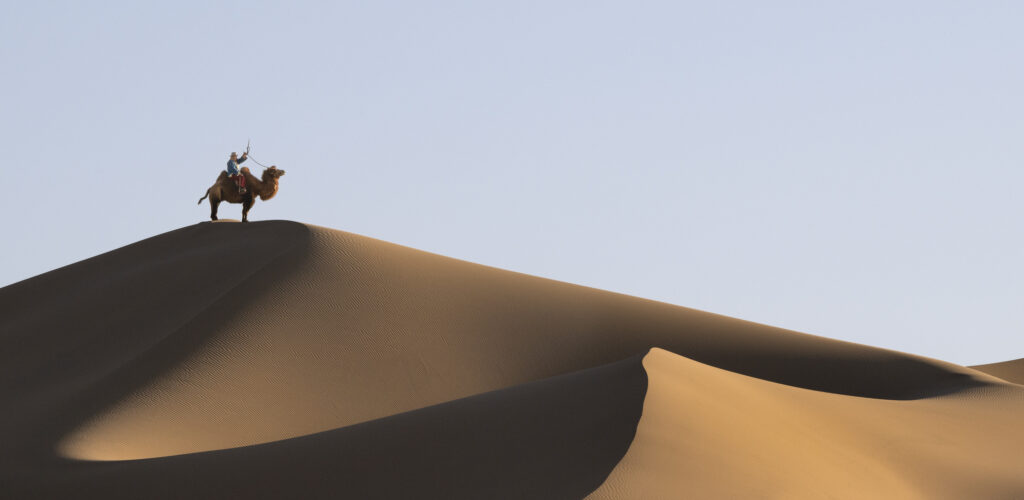
Other times, the human element is key, like camel herders crossing the dunes in Mongolia.
Lastly, many dunes are in dark sky areas, making an excellent foreground for an image of the stars.

Look for layers
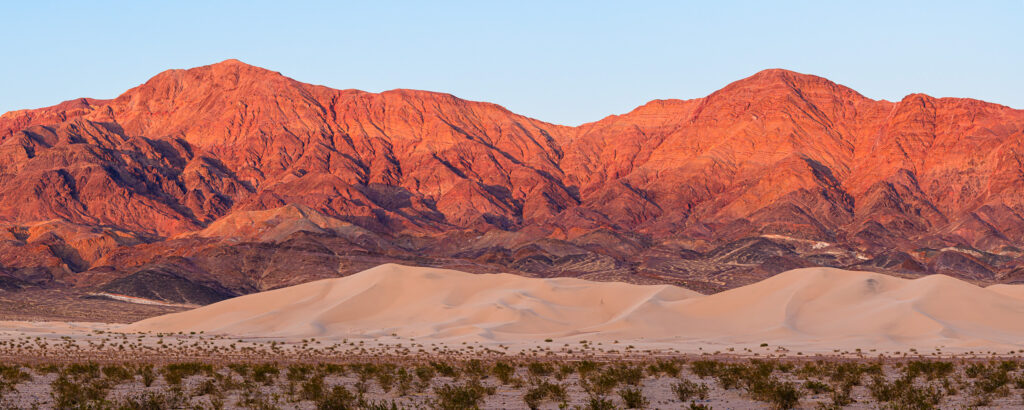
Layers of dunes provide depth and interest to photographs, so watch for them. Many dunes are also in mountainous areas. Use the dark-colored mountains as a background layer for light-colored dunes.

Where to find sand dunes
Sand dunes occur in many locations around the world. Our trips visit some of these locations, including Namibia and the Gobi Desert. For dunes closer to home, Death Valley National Park, White Sands National Park, and Great Sand Dunes National Park and Preserve are great choices.
Prepare for sand
Even on calm days, sand is everywhere when you’re in the dunes. Avoid putting your pack or gear on the sand; it gets into everything and is a pain to clean. The wind is great for filling in footprints and making new patterns, but if sand blows in the air, inevitably, it will get inside your gear. If the wind picks up, the desert air can quickly go from calm to a sandblaster-like environment.
If the sand blows, keep your gear covered until you are ready to use it. Bring eye protection and a bandana or mask to keep sand out of your eyes and mouth. Sunglasses may not be sufficient if it gets windy, so consider goggles. Also, ensure adequate water and sun protection in a hot, desert environment.
As a general rule, avoid changing lenses while in the dunes. Dust or debris can easily get on your sensor or inside your camera. Make your best guess about the focal length you plan to use, and mount those lenses before hiking into the dunes.
If you get sand or dust on your lenses, avoid using a lens cloth, which could scratch the lens. Instead, use a dust blower or a soft brush. When you get home from a dune photography session, blow off your gear and vacuum sand out of your pack. You may also need to clean off sand lodged in the legs of your tripod.