
Photographing moving water using motion blur
When photographing moving water, like waterfalls, running streams, or waves, adding motion blur to the water creates dramatic effects in your photos. Blurring the motion of the water gives the image a sense of motion and imparts a silky, dreamlike mood to the scene.
Blurring moving water isn’t difficult but requires specific gear and camera settings to maintain slow shutter speeds.
Gear needed for blurring water
- Tripod – Because you will use slow shutter speeds, you will need a tripod to blur moving water. You can’t handhold at these shutter speeds without introducing unwanted blur in the scene caused by camera movement.
- Camera with exposure controls – Motion blur requires manually setting shutter speed. Most cameras support this.
- Neutral Density filters (sometimes) – Filters are sometimes required for water motion blur, depending on the scene’s brightness and the desired amount of blur.
- Remote trigger release – Pressing the shutter button moves your camera and can create an unintended blur. Use a remote trigger release cable, the built-in timer, or exposure delay in your camera to trigger the shutter without moving the camera.
Settings for blurring moving water
The key to blurring moving water is controlling your camera’s shutter speed. The exact shutter speed depends on several factors, such as the speed of the water, the desired amount of blur, how close you are to the moving water, and the focal length you are using. In many scenes, a shutter speed of between 1/30 second and 2 seconds will provide a beautiful blur effect, though you can use even longer shutter speeds for dreamier creative effects.
Manual is the most flexible mode for your camera when blurring moving water. It lets you control the shutter speed, aperture, and ISO.
Many photographers use Shutter Priority mode to simplify the process. This mode lets you set the shutter speed while the camera automatically decides the aperture and ISO.
Proper exposure
When photographing moving water, white, frothy areas are the scene’s brightest. These white areas are exceptionally bright when sunlight is on the scene, and it is pretty easy to blow them out and lose details in the bright areas of your photos. Even with overcast light, blowing out these areas is common.
Use your camera’s histogram, highlight warnings (“blinkies”), or zebras to ensure you don’t clip those bright areas in the photo. The resulting image will be darker than your eyes see, but you can brighten it during post-processing, maintaining detail in the white areas of the water.
When to use filters
Neutral density (ND) filters are often needed to create motion blur effects with water, but this depends on the available light.
On heavily overcast days or during dim twilight hours, you may be able to achieve motion blur without a filter. This is particularly useful if you don’t have ND filters with you.
When you don’t have ND filters, you can restrict light gathered by your camera using these steps.
- Set the ISO to its lowest value, such as ISO 100 or ISO 64.
- Set a small aperture, smaller than you would have chosen for the scene, like f/18 or f/20, up to the smallest aperture your lens supports, like f/22 or f/32.
- Try to capture the scene with shutter speeds between 1/30 second and 2 seconds.
- Check the histogram to ensure you don’t blow out the highlights in the water. If the exposure is too bright after these adjustments, you must use ND filters.
When photographing brighter scenes during daylight hours, the only way to achieve water motion blur is to use ND filters to reduce the amount of light entering your lens.
If you have ND filters available:
- Depending on the brightness of the light, install a 3-stop or 6-stop filter. Install a 10-stop filter if you are going for very long exposures for dreamlike effects. You can also stack a 3-stop and 6-stop ND filter to cut more light from the scene when you don’t have a 10-stop filter available.
- Set an aperture appropriate for the scene. This may be something like f/8, but it might be smaller if you need additional depth of field.
- Use Auto ISO to allow the camera to choose the ISO setting. To prevent the highlights from being blown out, underexpose your photo by about -1 stop for white, frothy water.
- Photograph the scene between 1/30 second and 2 seconds, or longer if you want dreamlike blur effects.
Waterfalls
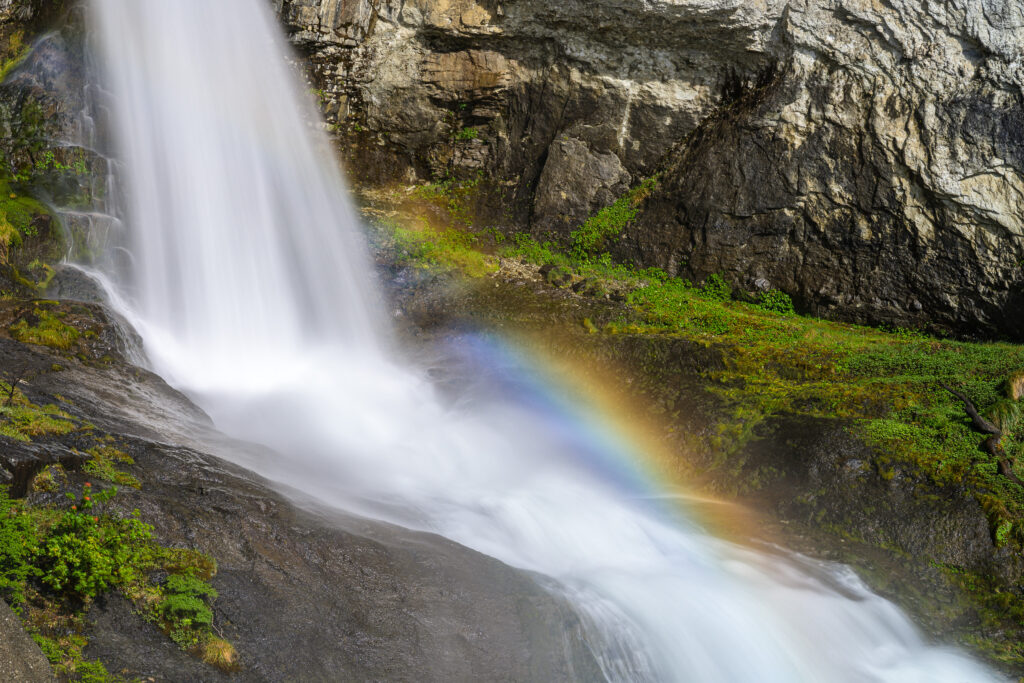
Blurring the motion of waterfalls is one of the most popular forms of motion blur photography. It imparts elegance to the images and nicely conveys the water’s motion.
It can be challenging to evaluate images on your camera’s screen properly. We recommend photographing waterfalls using a range of shutter speeds, generally between 1/30 second and 2 seconds. Then, when at home on your computer, review the images and choose the most aesthetically pleasing version.
Some photographers use very long shutter speeds of 5–30 seconds on waterfalls, resulting in fog-like water lacking detail. We prefer more of the wispy details of the flowing water at faster shutter speeds, but the creative choice is yours.
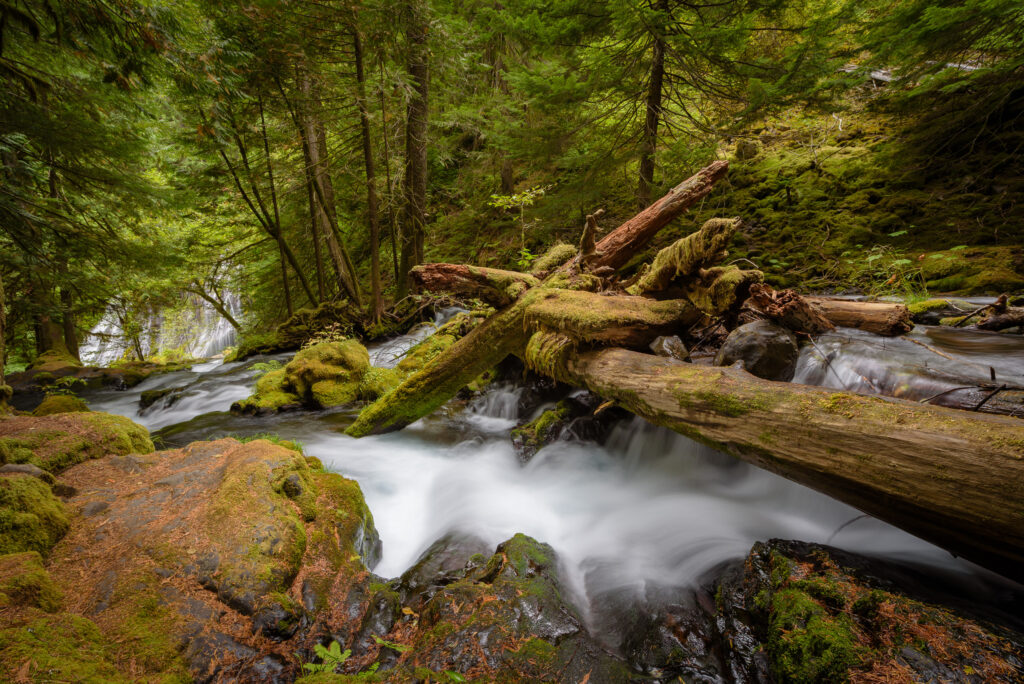
Click on the gallery to view a larger version of this waterfall captured between 1/25 second and 1.6 seconds. At 1/25 second, there is some motion blur, but the water looks choppy and not smooth. At 1.6 seconds, the water is silky smooth but has lost the wispy detail of the water. We prefer the 1/4-second exposure, with a pleasing mix of silky motion and wispy details. However, this is a creative decision, and you may like one of the other versions better.
This waterfall is blurred but choppy at 1/30 second and dreamy at 1/2 second. We prefer the 1/5 second exposure for the mix of blur and wispy details.
Waves
Blurring waves is popular when photographing oceans, seas, or lakes. It imparts moodiness and motion to a scene and shows the water in a creative way that the human eye doesn’t usually see.


Perfectly still water can be challenging to find. Often, a light breeze creates small ripples on the water’s surface. A slow shutter speed smooths out these ripples, creating a glassy appearance. This technique is also effective when ripples interfere with a reflection.


Motion blur isn’t always the right choice for waves. When the subject of your photo is fast-crashing waves with intricate detail, using a slow shutter speed for blur would erase all the interesting wave details.

Experiment with shutter speeds
We encourage you to experiment with various shutter speeds when blurring moving water. There is no perfect shutter speed, and the amount of blur introduced in the scene is a creative choice by the photographer.
Try various shutter speeds for each scene. Then, evaluate the results on a bigger screen at home, choosing the amount of blur that matches your creative aesthetic.