
How to photograph northern lights
The northern lights (aurora borealis) are the most exciting night sky phenomena to experience and photograph.
What causes aurora?
The Sun emits a stream of charged particles toward Earth, known as the solar wind. This solar wind hits the Earth’s magnetosphere at speeds ranging from 250 to 750 km/s and is directed towards the Earth’s magnetic poles by the Earth’s magnetic field. When the solar wind interacts with the Earth’s atmosphere, it causes nitrogen and oxygen to fluoresce. The most common color emitted is green, but auroras can also contain red and blue wavelengths, so that you can see green, magenta, purple, and even blue auroras. Read more about the science behind the northern lights.
Where are auroras seen?
During low to moderate solar activity periods, auroras are seen in a band known as the “auroral zone” at northern and southern latitudes between about 60° and 75°. In the northern hemisphere, they are known as the aurora borealis. In the Southern Hemisphere, they are known as the aurora australis.
In Europe, the auroral zone covers northern Scandinavia and the northern coast of Siberia. It also covers Iceland and southern Greenland. In North America, the auroral zone covers northern Canadian territories and northern Alaska.
As the intensity of solar wind increases during periods of high solar activity, the auroras brighten, the auroral zone expands, and auroras can be seen at lower latitudes. When the aurora borealis appears at lower latitudes, they are typically restricted to the northern horizon. At high latitudes in the auroral zone, the auroras may happen anywhere in the sky.
The aurora australis occurs in the southern hemisphere with the same frequency as the aurora borealis, but visibility is usually limited to Antarctica and the Southern Ocean. A substantial geomagnetic storm is required for aurora visibility in Chile, Argentina, South Africa, New Zealand, and Australia. There are far more land-based locations where you can reliably view the northern lights than the southern lights.
Best locations to see northern lights
With low-to-moderate activity levels, there are a variety of places that offer a good chance to see aurora overhead: Fairbanks, Alaska; Dawson City, Yukon; Yellowknife, NWT; Churchill, Manitoba; the southern tip of Greenland; Reykjavik, Iceland; and Tromsø, Norway. We offer aurora photography workshops in some of these locations.

If there is intense solar activity, auroras may be seen in various places in the U.S. and Europe. However, these events are rare.
We’ve experienced aurora from historic geomagnetic storms in the continental US and inside the auroral zone at high latitudes. There is a noticeable difference between the aurora at high and lower latitudes. High-latitude auroras are more intense, generally brighter, and have many distinct arcs and formations. The difference is difficult to explain until you have witnessed the aurora at both latitudes. If you are an avid aurora chaser, we encourage you to visit a location in the auroral zone for the best experience.
Best times of year for northern lights
While auroras occur in Earth’s atmosphere year-round, they aren’t visible during summer because the sky never gets dark enough at high latitudes. At high latitudes, like in Fairbanks and Yellowknife, the aurora season ends in April and begins in August. You also need clear skies to see the aurora, so cloudy locations often hide the aurora.
Statistically, auroras occur more frequently at the equinox than the solstice, meaning spring and fall are the best seasons for auroras. However, in the auroral zone, you still have a decent chance of aurora during winter, when the nights are longer.
Solar cycle
The Sun experiences periods of strong and weak magnetic activity, measured by the number of sunspots observed on its surface, known as the solar cycle. When the count of sunspots is at its highest, it is called solar maximum, and solar radiation, ejection of solar materials, and flares increase. With increased solar activity, the likelihood of aurora on Earth also increases.
The solar cycle lasts approximately 11 years, during which the Sun’s magnetic field flips during the solar maximum period. The current expected solar maximum is predicted to be between 2023 and 2026.
Aurora forecasts
Aurora activity rises as the intensity of solar wind increases. Satellites and ground-based devices monitor solar wind intensity, and the intensity of geomagnetic activity is reported by a number called the Planetary K, or Kp index. Solar wind forecasts also use observations of the Sun. When a coronal mass ejection (CME) is detected from solar flares or other solar activity, the odds of a geomagnetic storm on Earth increase.
The Kp index forecast is handy for northern lights photographers. At Kp 0–2, geomagnetic activity is low. If aurora are visible, they will be in the far-north auroral zone and may be faint. Activity increases at Kp 3–5, the auroras move further from the geomagnetic poles, and brighter northern lights occur in the auroral zone, with more motion and formations. At Kp 6–7, we are experiencing a geomagnetic storm with even brighter and more active auroras in the auroral zone. The auroras move even further from the geomagnetic poles, often visible from the northern edge of the United States. At Kp 8–9, there is a strong geomagnetic storm with very bright and active northern lights. These are the rare events where auroras extend further south into the U.S. and Europe.
The Kp index isn’t always helpful at high latitudes in the auroral oval. At these latitudes, you may experience northern lights at any Kp number, even Kp 0. At middle altitudes, like Montana, Washington, or Michigan, you need a high enough Kp value before northern lights are possible.
Here are four NOAA maps showing how the auroral oval changes over North America for various Kp values.
Space weather forecasting is not as accurate as typical weather forecasting, and a high Kp number doesn’t guarantee aurora, but it increases the likelihood of seeing them. Astronomers cannot predict precisely when a coronal mass ejection (CME) will occur. When they occur, it is difficult to predict the exact speed and direction of solar particles approaching Earth. The only reliable aurora forecast comes from satellites about 30 minutes to an hour from Earth. Because of these uncertain forecasts, aurora photography requires patience.
Aurora forecasting reveals more than just the Kp index number; other reported numbers can be equally crucial in determining the probability of visible auroras. First, look at the solar wind speeds. The higher the solar wind speed, the more likely it is to experience intense auroras. A typical solar wind speed is 250–500 km/sec. Coronal holes may produce 500–800 km/sec solar winds, and Coronal Mass Ejections can even make higher wind speeds.
The interplanetary magnetic field (IMF) must be strong and in a southward alignment to see visible auroras. The Bt number is the total strength of the IMF. You want the Bt number to be high. The Bz number indicates whether the solar particles are being pushed into or away from the Earth’s magnetic field. You want a negative Bz number where the solar winds are forced into the Earth’s magnetic field. During intense auroral activity, the aurora may still be seen with a positive Bz number, though it will likely be weaker than if the Bz number is negative.
The best time of night for seeing and photographing the aurora is between 10 PM and 2 AM, though they often occur outside of that timeframe, especially during geomagnetic storms.
Various apps for iPhone and Android can help you track the current aurora forecast. Remember, these apps’ forecast information is identical, as they are all pulled from the same publicly available sources. What is different between the apps is the presentation of information and alerting. Many apps offer alerts for an additional cost. If you are an avid aurora seeker, it may be worth paying for alerts. We currently use this app for aurora forecasts and alerts: Northern Lights Aurora Forecast for iPhone and Android.
Camera gear for northern lights
Camera
To photograph the Northern Lights, you will need a few pieces of gear. First, you should have a camera that allows manual exposure settings adjustment: shutter speed, aperture, and ISO. Ideally, the camera should support RAW files, giving maximum post-processing flexibility. Mirrorless cameras, DSLRs, and many point-and-shoot cameras support this.
Lenses
You should have a camera lens with a wide aperture to allow more light to enter. The general recommendation for night sky lenses is to use a fast lens with a maximum aperture of at least f/2.8 or wider, like f/1.8 or f/1.4. Wider apertures are helpful when the auroras are very faint, but smaller aperture lenses, such as f/3.5, f/4, or f/4.5, will also work when the auroras are bright.
Auroras are enormous in the sky. To capture more of them, you’ll want a wide-angle lens. A focal length between 14 and 24mm on a full-frame camera is excellent for photographing auroras. The equivalent focal length for APS-C crop sensor cameras ranges from 9 to 16mm.
Tripod
You also need a sturdy tripod. Like other night sky photography, the available light is low, and you need slow shutter speeds to capture the scene. The tripod will prevent blur caused by camera motion.
When photographing with slow shutter speeds, it is important not to bump or jostle the camera, including pressing the shutter button. A cable release or the camera’s built-in timer is an effective way to release the shutter without having to move the camera.

Headlamp
When photographing at night, especially without moonlight, you need a headlamp that supports bright white and red light. The bright white light is used when hiking to and from your shooting location, setting up, or cleaning up at night’s end.
When photographing dark skies, your eyes adjust to the low-light environment after 10–20 minutes and become far more sensitive than they are during daylight hours. Turning on a bright white headlamp or flashlight will reset this process, so it is far better to use the red mode of your headlamp. Red light still allows you to see, but doesn’t reset the dark adaptation process in your eyes.
Batteries and memory cards
Lastly, ensure you have an adequate supply of camera batteries and memory cards.
Lens wipes/lens heater
Since you’ll be out late, you may need to prevent condensation on your lens if the temperature reaches the dew point. Bring lens cloths to wipe off the lens if this happens. In a humid environment, a lens heater may be a better option.
Other gear for northern lights viewing
Many aurora outings are in cold climates. It will be colder at night, so dress warmly and have gloves, hats, and hand warmers available.
Since you may be out most of the night, bring something to drink and snacks to keep you fueled.
Detecting faint auroras
When aurora activity is low, or they first begin to appear at night, they can be quite faint to the human eye. You may only see a whitish haze, appearing like light pollution. For very faint auroras, camera sensors do a much better job than your eyes.
When you suspect you see faint auroras, snap a picture with your phone or camera. The camera sensor will show a much stronger green color than your eyes will see. Learn why your cameras see auroras better than your eyes. Intense auroras light up the sky and surrounding landscape, and you’ll need no camera assistance to spot them.
Camera settings for northern lights
The brightness and motion of the aurora vary considerably. When photographing throughout the night, it is common to change your shutter speed and ISO settings frequently as the intensity and motion of the aurora change. Because of this, it is easiest to control the camera in Manual mode.
Focus
You need to focus at infinity to maintain sharp stars, which is challenging when photographing under a dark, moonless sky. Read more about how to achieve focus at infinity for night sky photography.
Color temperature/white balance
A neutral white balance for a night sky without artificial lights is around 4,000 K. If you let the camera choose your white balance, you will get images somewhere between 4,000 K and 5,000 K. At 4,000 K, the aurora are a blueish green; at 5,000 K, they are a yellowish green. Setting your camera to a white balance of 4,500 K gives a pleasing result, but the photographer can adjust this to personal taste. If you photograph a scene with artificial lighting, such as in a town or city, you may need to change the white balance to match the color of those lights.

If you photograph using RAW files, you can set whatever color temperature you like in post-processing. If you only use JPEG files to photograph, you’ll be stuck with the white balance set in your camera.
Aperture
When photographing the night sky, you want to gather as much light as possible. Set your aperture to the widest aperture it supports (the lowest f-stop number), such as f/2.8 or f/4. If your lens supports wide apertures, like f/1.4 or f/1.8, you may want to set your aperture slightly smaller to f/2 or f/2.2 to reduce comatic aberration in the stars in the corners of your image.
Shutter speed
When the auroras are incredibly faint, you’ll want to use a shutter speed appropriate for a starry sky. The shutter speed should be slow enough to gather light but fast enough to maintain pinpoint stars without trails. The shutter speed should be no slower than 15 seconds for many cameras with wide-angle lenses. You’ll need much faster shutter speeds at telephoto focal lengths to prevent star trails.
As auroral activity intensifies, you may see lots of motion and changing formations, and sometimes the motion is quick. Faster motion means brighter aurora, so you can use faster shutter speeds than you can for just the stars. Use a shutter speed of 3–5 seconds to capture the changing formations more crisply. When the auroras are exceptionally bright and fast, you may use speedier shutter speeds, like 1–2 seconds.
ISO
The ISO setting you need fluctuates as the brightness of the aurora changes and as you adjust your shutter speed. You’ll often adjust this setting when photographing the Northern Lights.
Start with ISO 1600 and take a test shot. Use the histogram on your camera as a guide to find the appropriate ISO setting. A well-exposed aurora photo will have a histogram where the data peak on the right ends about midway on the horizontal axis. This will give the photo adequate brightness while maintaining a nighttime appearance.
If your histogram shows data peaks too far to the left, your image is too dark, and you should raise the ISO. If your histogram shows data peaks approaching the right edge, your image is too bright, and you should lower your ISO.


During periods of intense aurora activity, the brightness can go up dramatically. In an RGB version of the histogram, you may see the green channel, in particular, approaching the right edge of the histogram. You want to avoid the right edge of the histogram. You will lose detail and color depth by blowing out the colors in an image that is too bright. Lower your ISO setting or raise your shutter speed to make the image darker.

Long-exposure noise reduction
Many cameras support a feature called long-exposure noise reduction. The camera captures two photos when the shutter speed is one second or longer. First, the camera captures the image, then closes the shutter and captures a black frame. Before saving the image, the camera can subtract hot pixels and other thermal noise in the black frame. The downside to long-exposure noise reduction is that it doubles the time to take a picture. If your shutter speed is 10 seconds, the total duration of your shot is 20 seconds.
Long-exposure noise reduction is nice when photographing very dark skies. However, with quickly changing auroras, the extra time to take the image is restrictive. Also, as the aurora gets brighter, you will get less and less noise in your image and may not need it. Because of this, we don’t recommend long-exposure noise reduction when photographing aurora.
Composition
Aurora displays can be visually overwhelming, sometimes covering the entire sky. You may see mesmerizing formations or wild colors just about anywhere, and many photographers point their cameras randomly at auroras throughout the sky. While an aurora-only photo can be attractive as an abstract, the most compelling images include a strong foreground element and landscape.
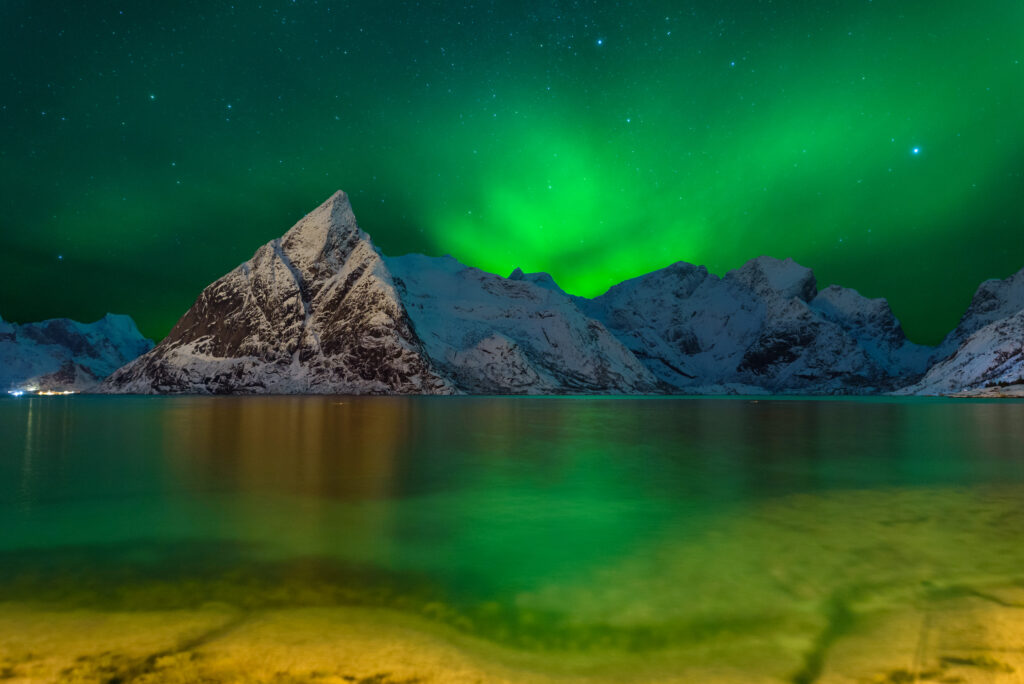
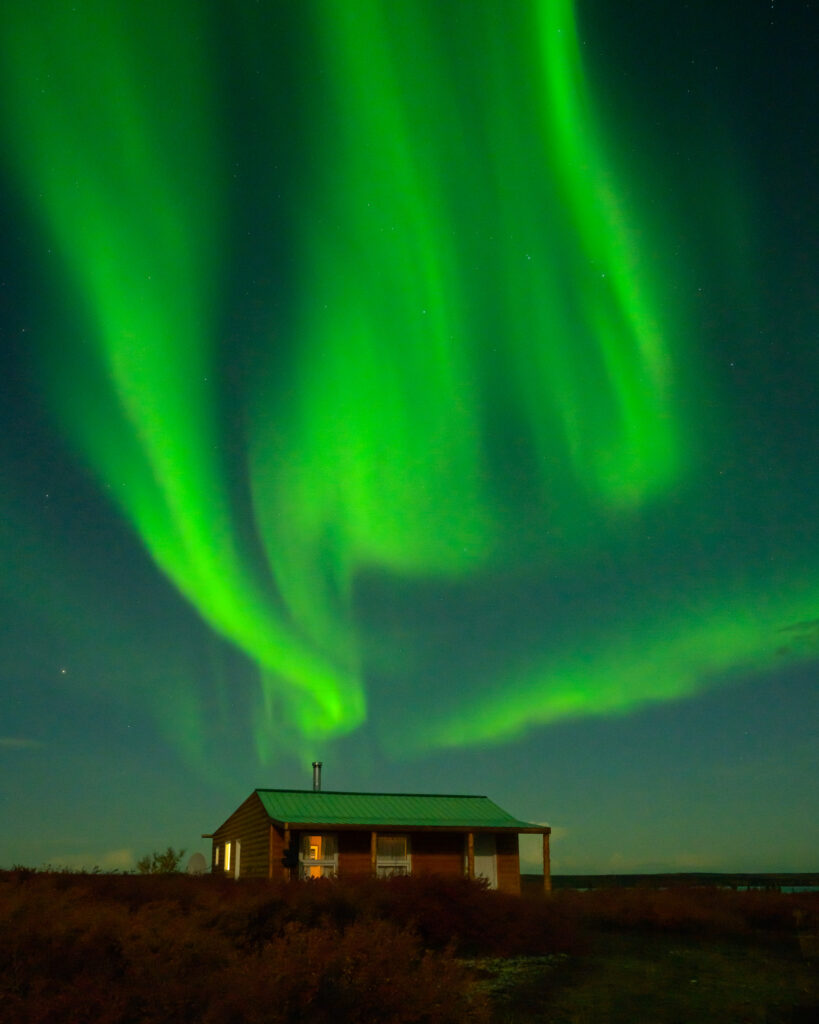
Adding a foreground element to an aurora image anchors the scene, giving the viewer a frame of reference and a sense of scale. These elements can be simple, such as a person, a mountain, a lone tree, a tree line, or a manmade object. Reflections in a lake or river are also compelling foreground elements.
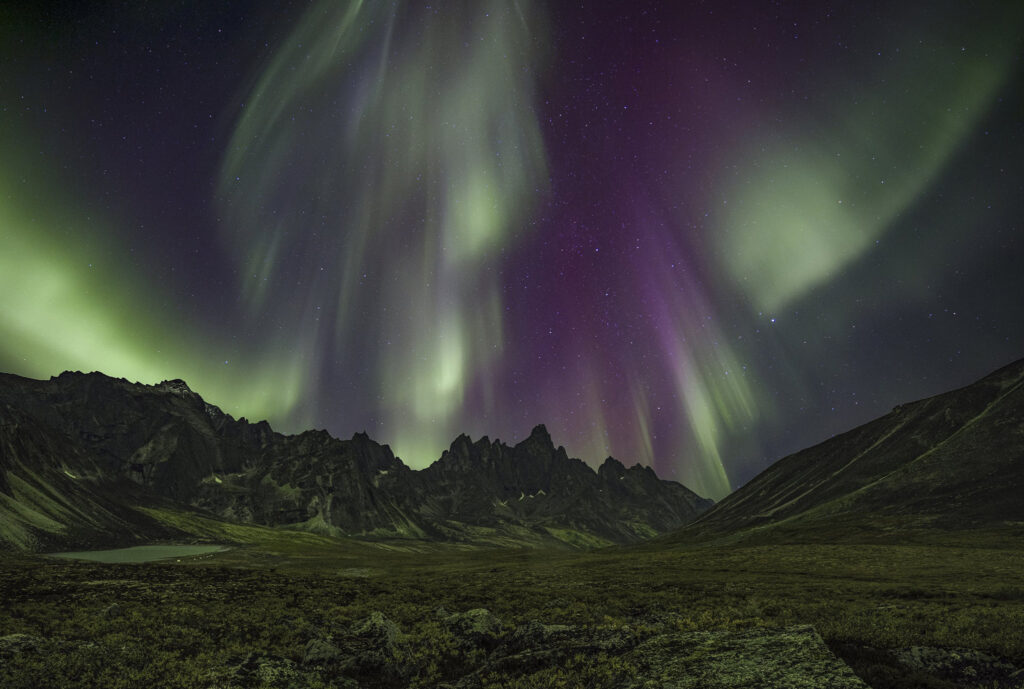
Creating interesting compositions in the dark can be challenging, so it’s best to visit your location during daylight hours. Use your daylight scouting to find your locations and pre-visualize the scene you have in mind—that way, you know where you’ll place your camera when you return in the dark.

Take lots of photos
Be prepared to take lots of photos. Aurora will ebb and flow, with periods of high and lower activity. Watch for curling shapes, ribbons, curtains, or fountains as they form, move, and dissipate. Also, watch for colors. Green will always be present, but the other colors may come and go.
You don’t need to take a photo every moment of the night, but when you see an aurora formation that is compelling in your composition, take a series of pictures as it moves and changes.
Aurora timelapse
When the aurora are moving and dancing across the sky, capturing a time-lapse is a fun way to photograph them. When capturing a timelapse, consider the following settings.
- Set a fixed white balance. Using Auto White Balance will result in varying colors for each frame.
- Use a relatively fast shutter speed. The faster your shutter speed, the smoother the motion in the final timelapse video will be. A shutter speed of 1–2 seconds or quicker will yield better results, provided the auroras are bright enough to support these shutter speeds.
- Set your exposure to be darker than usual, as you cannot predict brighter bursts during the timelapse. Then, brighten your images in post-processing when creating your timelapse video.
- While you can use the intervalometer in your camera or an external intervalometer, most of these timers insert a delay of 0.5″–1″ between each frame. For the smoothest time-lapse video, consider a different technique. Set your camera’s exposure settings, then switch to continuous release mode. Using a cable release, press and lock the cable release button down. Because you are using continuous release mode, the camera will continue taking images without delay between frames.
- A typical video may have 24 frames per second. To create a 30-second timelapse video, you’ll need to capture 720 frames.
Enjoy the northern lights
Sometimes, the camera doesn’t capture the in-person experience of the Northern Lights. When the auroras fill the sky, dancing and curling everywhere you look, take a break and enjoy the show with your eyes.