How to Photograph Wildlife in Bad Weather (and Why You Should)
By Kevin Pepper |
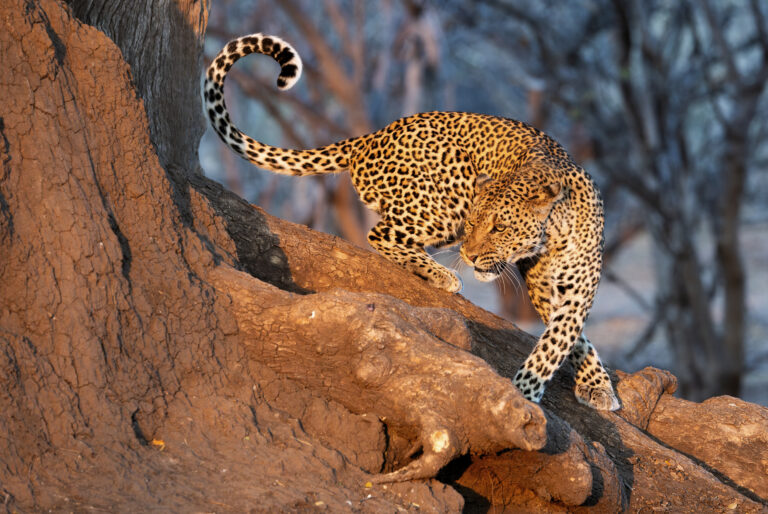
Where most people see inconvenience, a wildlife photographer sees atmosphere when they photograph wildlife in bad weather.
I’ve lost count of the number of times I’ve watched photographers zip up their camera bags and call it a day as clouds rolled in. And I get it—weather can be uncomfortable. Wet hands, foggy lenses, unpredictable light. But here’s the truth: some of the most powerful wildlife images I’ve ever taken happened in “bad” weather.
Fog turns a forest into a dream. Snow adds contrast and energy to a scene. Rain creates reflections, catches the light, and—if you’re lucky—paints a story of survival on feathers and fur.
So if you’re the kind of photographer who’s willing to get a little wet, a little cold, and a little uncomfortable… this post is for you.
Why Bad Weather is Good News for Wildlife Photography
Let’s start with the obvious question: why bother?
Because mood matters in wildlife photography. A Great Grey Owl standing on a branch in golden sunshine is beautiful. But a Great Grey Owl backlit at dawn on a morning of -30f? That’s cinematic. Bad weather creates atmosphere—literally. It helps you break out of the “pretty postcard” category and move into something more evocative. Minimalism, mist and snow strip down the distractions, guiding the viewer straight to your subject. And it makes your images feel more real, more raw, more powerful.
Because it’s when wildlife moves. Many animals are more active in cooler, overcast conditions. Rain can trigger migration events. Predators hunt more readily under cloud cover. You’ll often see more behavior, more interaction, and—if you’re ready—more magic.
Gear Prep: Protecting Your Photography Equipment to photograph wildlife in bad weather
Before you shoot in bad weather, you need to trust your gear—and protect it.
- Rain covers: A dedicated rain cover or even a shower cap can save your camera. I’ve used everything from plastic bags to pro-grade covers depending on the situation.
- Lens hoods: Use them. Not just for sun but to shield from droplets and blowing snow.
- Microfiber cloths: Carry multiple. One lives in my coat pocket, another in my bag, and one always wraps around my lens.
- Dry bags: For your spare gear, extra batteries, and memory cards.
- Silica packs: Toss these in your bag to absorb moisture after a damp shoot.
- Weather-sealed gear: If you shoot in the elements regularly, invest in cameras and lenses built for it. It’s worth it.
Pro tip: Bring a towel. Wipe down your gear after every session. It seems basic, but it’s the first step in avoiding long-term damage.
Shooting Techniques for Wet, Foggy, or Snowy Conditions
When the weather turns, your camera sees the world differently—and so should you. The way light bends, reflects, or disappears entirely can work for you or against you, depending on how you adapt. Below are detailed techniques, broken down by conditions, to help you turn unpredictable weather into your creative edge.

Fog and Mist
Fog softens everything—it lowers contrast, reduces color saturation, and creates natural diffusion. This is where mood lives.
- Expose to the Right (ETTR):
Your camera’s meter sees fog as a bright scene and will try to darken it, leading to dull, gray results. Slightly overexpose—typically by +1/3 to +1 EV—while monitoring your histogram to preserve highlight detail. You’re aiming to keep the fog luminous, not muddy. - Shoot for Shape, Not Detail:
Fog simplifies. Instead of sharp detail, look for clean outlines and strong shapes—deer antlers, long necks of cranes, lone trees. Minimalism becomes your friend. - Use Backlight for Glow:
When the sun rises behind fog, it lights the particles and creates a magical halo effect. Position yourself so the light comes through the mist toward your subject. This works particularly well with birds in flight, antlers catching light, or animals in open meadows. - Manual Focus Can Save the Day:
Autofocus can struggle in low-contrast scenes like fog. Switch to manual or use focus peaking if your mirrorless camera supports it. - White Balance Tip:
Auto white balance can cool down fog more than desired. Try Cloudy or Shade to retain the warmth if that’s the mood you’re after, or go cooler to enhance the eerie tone.

Rain and Drizzle
Rain brings texture, drama, and behavioral changes in wildlife. The key is knowing how to highlight those elements without losing technical control.
- Shoot Wide Open for Drama:
Apertures like f/2.8 or f/4 blur backgrounds and make falling rain or droplets stand out against a soft backdrop. It adds a painterly, emotional quality to the image—especially in darker forest environments. - Use Contrast to Your Advantage:
Wet fur darkens and reflects ambient light differently. Try side lighting to make those wet textures pop. Dark, rain-slick coats or feathered backs will shimmer under soft directional light. - Fast vs. Slow Shutter Speeds:
- Fast (1/1000s+): Freeze individual raindrops, ideal for action shots or birds in flight during a downpour.
- Slow (1/50s–1/125s): Blur the falling rain to show movement—this works beautifully for more artistic or emotional wildlife portraits.
- Look for Interactions:
Rain changes behavior. Birds preen more, mammals shake off water or huddle with others. These interactions make compelling, story-rich frames. - Lens Hood Is a Must:
Keeps droplets off your front element and helps reduce flare from low-angle clouded light.

Snow
Snow photography is about contrast, light control, and subtle detail. It also demands a good understanding of exposure metering.
- Bump Your Exposure:
Snow is bright and fools your camera into thinking the scene is too hot, so it compensates by underexposing. Dial in +1 to +2 EV compensation to maintain clean, white snow. Watch for histogram clipping in highlights—especially in direct sunlight. - Find Anchors in the Composition:
Snow simplifies scenes dramatically. That’s great—until it becomes a whitewash. Use dark elements like rocks, trees, or the animal itself to anchor your composition and draw the eye through the frame. - Play with Shutter Speed and Snow Type:
- Gentle flakes: Use faster shutter speeds to freeze them in place—great for animal expressions and eye contact.
- Heavy snowfall: Slower speeds (~1/125s) will give a dreamy blur to the flakes and isolate the subject beautifully.
- Focus on the Eyes—Always:
Snow can create chaos in the frame. A sharp, well-lit eye (especially surrounded by snow blur or falling flakes) becomes your focal anchor. Use single-point autofocus to ensure precision. - Spot Metering Helps:
When photographing a dark subject in bright snow, switch to spot metering and expose for the subject’s midtones. It helps avoid blowing out the background while keeping fur or feather detail. - Mind the Color Casts:
Snow reflects everything—including color from the sky. On overcast days, it can go blue. Shoot in RAW and correct white balance in post, or warm it slightly in-camera to match the mood you’re after.
Final Weather Shooting Tips To Photograph Wildlife in Bad Weather
- Rain + Backlight = Drama: Try positioning yourself opposite the light source. Backlit rain or snow glows with a magical intensity—especially in early morning or late day light.
- Use Your Environment: Vehicles, trees, or even overhanging cliffs can shelter you and your gear during sudden weather shifts.
- Don’t Chase, Wait: In all of these conditions, slow down. Let the weather unfold around you. The drama will come.
How to Compose for Story and Mood
In good weather, we compose for clarity. In bad weather, we compose for feeling.
- Use negative space. A lone wolf crossing a white field becomes a story of isolation.
- Frame through obstacles. Misty branches or a windshield speckled with rain add depth and immersion.
- Include the elements. Don’t hide the snow or the rain—celebrate it. Let it be part of the frame, not just something you work around.
Stay Comfortable, Stay Longer
And remember, perfection isn’t the goal here—emotion is.
The truth is simple: if you’re cold, wet, or miserable, you won’t wait for the shot. You’ll pack it in early, even if the light is just starting to turn or the animal finally steps into view. Meanwhile, the photographer who’s warm, dry, and prepared is still out there… and getting the frame you’ll wish you had.
Comfort isn’t just a luxury—it’s a strategy. The more comfortable you are, the longer you stay. And the longer you stay, the better your chances.
Here’s how to stay in the field when the weather turns against you:
Dress Like You’re Going to Be Still—Because You Are
When you’re photographing wildlife, you’re not hiking. You’re sitting. Sometimes in snow. Sometimes in standing water. You’re not generating body heat—you’re losing it.
- Waterproof Outer Layers (Jacket + Pants):
Look for breathable, seam-sealed waterproof shells like Gore-Tex or equivalent. A plastic rain poncho doesn’t cut it—it traps moisture inside and leaves you clammy. Invest in gear that lets sweat escape but blocks rain and wind completely. Example: In Finland photographing brown bears, I spent eight hours in a hide during a downpour. My rain gear kept me dry, and I was able to keep shooting long after others left. - Insulated, Waterproof Boots:
Your feet are in contact with the coldest, wettest parts of the environment. Opt for insulated boots with a high waterproof rating—Muck Boots or Baffin are great examples for snow and bog conditions. Pro Tip: Slip foam insoles inside for added warmth. In icy conditions, consider traction devices like Yaktrax or microspikes. - Base Layers:
Merino wool or synthetic thermal layers regulate your body temp and wick away moisture. Avoid cotton—it holds sweat and cools you down fast.
Protect Your Hands—Without Losing Control
Gloves are tricky. You need to keep warm, but also handle your gear with precision.
- Thin Shooting Gloves:
Look for gloves designed for photographers or hunters—windproof, lightly insulated, with tactile fingertips or flip-back trigger fingers. Brands like Vallerret or The Heat Company specialize in these. - Hand Warmers:
Slip disposable warmers into your gloves or pockets. Even in moderate cold, they make a difference after hours of inactivity. Bonus Use: Keep one near your batteries. Cold zaps battery life—warmth keeps them working longer.
Bring Layers—And Use Them Smartly
Dressing in layers isn’t just about staying warm—it’s about being adaptable. Weather changes fast.
- Layering System Example:
- Base: Merino wool long sleeve
- Mid: Insulated down or synthetic jacket
- Shell: Waterproof, windproof outer layer
- Optional: Fleece neck gaiter or buff to seal off the collar
Don’t Forget Creature Comforts When You Photograph Wildlife in Bad Weather
These aren’t essential to exposure—but they are essential to morale.
- Thermos of Coffee or Tea:
Hot liquid on a cold day is a mental reset button. Sip slowly, breathe deeply, stay in the moment. - A Sit Pad or Foldable Stool:
Something simple to keep your rear off the cold ground. Closed-cell foam pads work great, or use a foldable hunting stool if you’re staking out a location for hours. - Snacks You Can Eat with Gloves:
Energy bars, trail mix, jerky—nothing messy or that needs prep. You’ll thank yourself when movement is minimal.
Shelter and Improvised Protection
Even if you’re exposed, there are ways to create micro-environments for comfort and gear protection.
Windbreaks:
If natural cover isn’t available, create your own with a small tarp, bungee cords, or a collapsible light stand and jacket.
Umbrella Clamp:
Use a photography clamp to attach an umbrella to your tripod—works in moderate rain or snow to keep your camera and face dry.
Pop-Up Blinds or Ground Hides:
Great for extended sessions with minimal movement. They block wind, hold in warmth, and let you stay hidden in comfort. Some even have waterproof floors.
My Most Memorable “Bad Weather” Wildlife Photos

In the deep silence of the Arctic forest, everything feels amplified—the creak of your parka, the crunch of ice underfoot, even your own breath curling in the frozen air. I sat alone in a blind, the temperature well below -40°C, so cold the metal of my lens could burn bare skin. Hours passed in stillness, the kind that makes your instincts sharper. Then, through the dense forest, it appeared—a Canada lynx. Almost invisible. Watching me. Stalking in absolute silence. I wasn’t just photographing a predator—I was being studied by one. And in that moment, surrounded by cold, alone in the wilderness, I was completely alive.
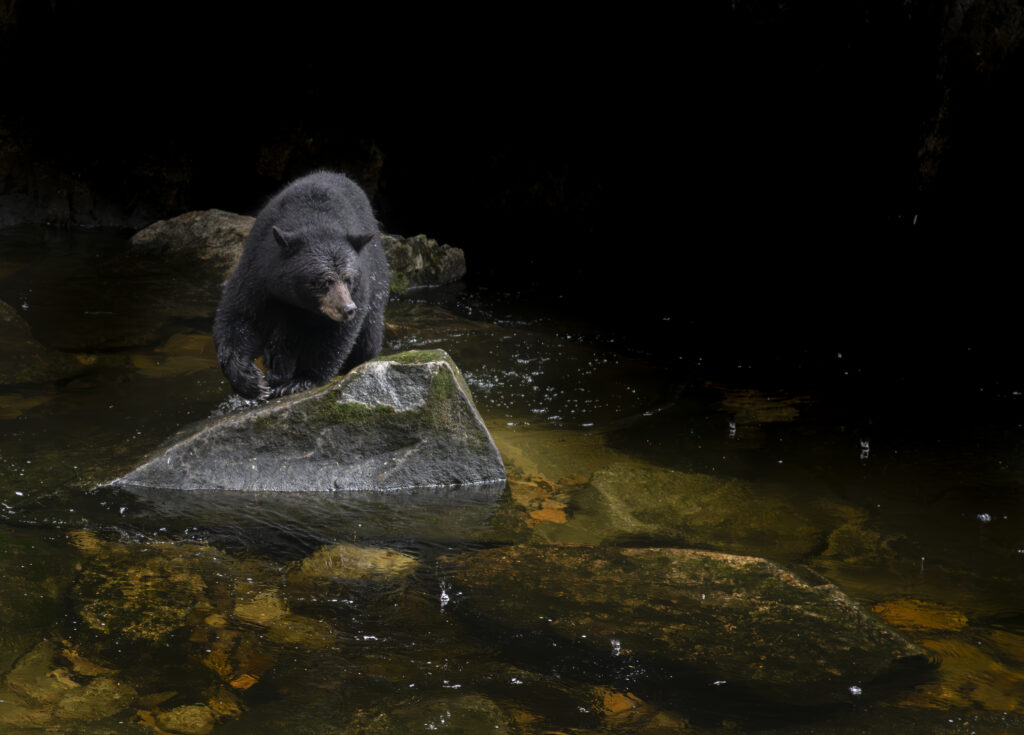
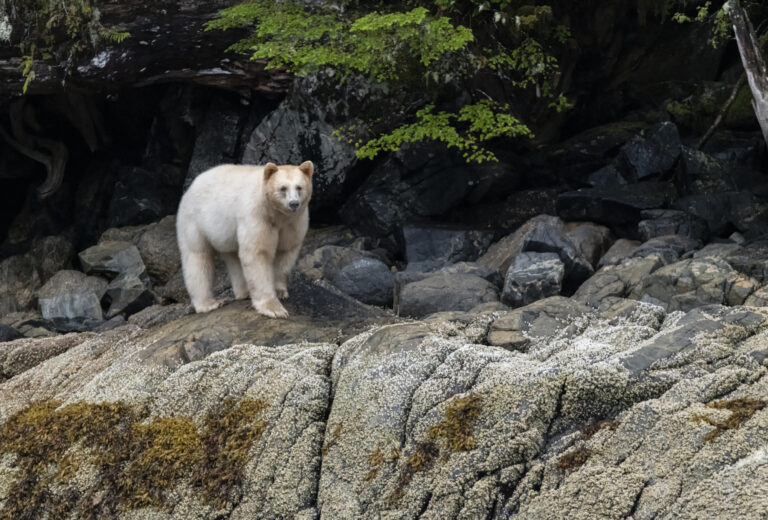
We sat motionless in the Great Bear Rainforest, rain hammering down so hard it drummed against our hoods like a warbeat. Hunched forward, heads down, we let the water slide off our jackets, hoping to stay just dry enough to keep shooting. Hours passed like this—drenched, chilled, and focused. We had come for the elusive Kermode bear, the rare ghost of the forest, but nature had other plans. Just when the cold was starting to gnaw at our patience, a black bear emerged, gliding silently along the river’s edge, scanning for salmon. It wasn’t the white spirit bear we dreamed of, but in that moment—soaked to the bone, cameras ready—it was just as rewarding.

After hours of waiting under a bruised, storm-choked sky, the rain finally broke into a torrential downpour. Thunder rolled across the Serengeti like distant artillery. Through the sheets of rain, a lion emerged as the air cleared—drenched, unbothered, and powerful. He lay in the grass, motionless, then shook the water from his mane like a king reclaiming his throne.
Not one of those images would have happened under blue skies in flip-flops.
Final Thoughts When You Photograph Wildlife In Bad Weather
Photographing wildlife in bad weather isn’t just about getting the exposure right—it’s about shifting your mindset.
Nature doesn’t operate on our schedule, and the most compelling moments often happen when conditions are far from perfect. Fog, rain, and snow challenge you to slow down, look differently, and shoot with more intention. That’s when your images start telling stories—not just showing subjects.
On our wildlife photography workshops, we don’t pack it in when the weather turns. We lean into it. We teach you how to shoot through the elements, how to see creatively in challenging light, and how to transform a snapshot into an unforgettable photograph.
Because when others head for shelter, we stay out a little longer.
And that’s often when the magic happens.