Mastering Backyard Bird Photography: A Guide for Amateur Photographers
By Kevin Pepper |
I remember the first time I pointed my camera out the kitchen window at a red cardinal perched in a snow-covered tree. The light was golden, the bird was perfectly still, and I thought, “This is it. National Geographic, here I come.” Then I checked the shot… and it was blurry and underexposed, and the bird’s head was turned completely away from the camera. That was my introduction to backyard bird photography. A lesson in humility, patience, and the quiet joy of discovering wildlife right outside your door.
Over the years, I’ve learned that photographing birds in your backyard can be just as rewarding—and just as challenging—as a safari in Africa or a trip to the Arctic. If you’re an amateur photographer hoping to improve your skills, this guide will walk you through the essentials and help you create beautiful images from the comfort of your own home.
Start with the Right Mindset for backyard bird photography
Bird photography teaches you to slow down and observe. Unlike landscape photography, where the mountain isn’t going anywhere, birds move fast, unpredictably, and often when you least expect it.
You’ll need patience. Birds might not show up when you want them to. They won’t pose. And they certainly don’t care about your perfect composition.
But that’s the magic. When everything lines up—a sharp image, perfect light, and a curious glance from a chickadee—it’s incredibly rewarding.

Gear Essentials for Backyard Bird Photography
Let’s clear this up: You don’t need a $10,000 lens to get started. Use what you have and build from there.
Camera Bodies
- Entry-level DSLRs or mirrorless cameras (such as the Nikon Z6 or Sony a6400) are perfect starters.
- Even bridge cameras with super zooms, like the Nikon P950, can produce great results.
Lenses
- A 200mm lens will get you started, but you’ll soon appreciate the reach of a 300mm or 400mm. A 100-400mm zoom lens is versatile and great for beginners.
Tripods or Monopods
- If you’re sitting in a hide or shooting through a window, a tripod adds stability.
- A monopod is a great compromise between stability and mobility.
Other Useful Tools
- A remote shutter release can help reduce camera shake.
- A bean bag is handy if you’re shooting from the ground or a windowsill.
- Extra memory cards and batteries—you’ll need them!
My Gear For Backyard Bird Photography
Let’s take a look at the camera gear I use for my backyard feeder setups.
Camera Bodies
- Nikon Z8 or Z9
Lenses
- A Nikon Z 180-600mm f/5.6-6.3 VR or a Nikon 500mm f/5.6E PF ED VR
Tripods or Monopods
- A sturdy tripod with a Jobu Jr 3 Gimbal Head
Other Useful Tools In My Kit
- A remote shutter release to minimize camera movement.
- Extra memory cards and batteries!
- A coffee, a bottle of water, and some snacks

Creating a Bird-Friendly Backyard – Set Up Feeders and Baths
Want birds to come to you? Give them a reason. Before you even pick up your camera, take a good look around your yard. Where you place your bird feeder and perches can make all the difference—not just for attracting birds, but also for capturing beautiful, natural-looking images.
Location, Location, Location
Some spots in your yard will naturally be better than others. For instance, placing a feeder in the middle of an open lawn might expose small birds to predators like hawks. Set it too low, or too close to a fence, and you’ve essentially rolled out the red carpet for every neighborhood cat and squirrel.
I prefer to position my feeder in a corner of the yard where it’s somewhat protected. In my case, tall evergreens provide a natural shelter—great for the birds, and even better for the photos.
Chasing the Light
One thing many beginners overlook? Light. Think about the time of day you’ll be shooting most often. Ideally, you want the sun behind you or over your shoulder to get soft, even light on the birds.
In my own setup, I have a sweet spot that gives me beautiful late-day light. In the early evening, the sun starts over my right shoulder and sets over my left—a perfect arc that lights the scene beautifully without casting harsh shadows.
Natural Perches Make Better Photos
When it comes to perches, nature beats the hardware store every time. Birds tend to land near feeders while waiting their turn, so give them a perch that looks natural and complements the scene.
I avoid using the metal arms or manufactured poles that often come with feeders—they can look stark and out of place in photos. Instead, I’ll attach cut branches to my setup to create perches that blend in with the environment. I even rotate these branches regularly to give my photos a variety of natural backdrops and avoid every shot looking the same.
Building a Photo-Ready Setup for backyard bird photography
Your bird feeder’s main job is to attract birds. But your goal as a photographer? Capture them while they’re perched nearby, waiting their turn. That’s where the real magic happens—when they pause for just a moment on a perfectly placed branch, giving you the shot you’ve been waiting for.
Go Native with Your Landscaping
To really make your backyard a bird magnet, plant native trees, shrubs, and flowers. Native flora supports the insects and food sources that local birds rely on. Whether you’re in the heart of a city or surrounded by open countryside, your plant choices can influence the variety of birds that visit.
Backgrounds Matter
A cluttered or distracting background can ruin an otherwise perfect shot. When setting up your feeder and perches, look behind the scene—not just at it.
Avoid shooting toward fences, garden tools, or any man-made structures that create visual noise. Try to find a backdrop that’s uniform and natural. In my backyard, I use a wall of cedar bushes. The dense greenery blurs beautifully when I shoot with a shallow depth of field, providing a smooth, non-distracting background.
Maximizing Background Blur
Here’s a little trick for making your backgrounds buttery soft: create as much distance as possible between the bird and whatever is behind it.
The closer you are to your subject and the farther that subject is from the background, the more blur you’ll get—even if you’re not shooting wide open at f/2.8. This is a great way to isolate the bird and give your photo that clean, professional look.
In my current setup, I’m about 50 yards from the feeder. The background—those cedar bushes I mentioned—sits about 20 yards behind the feeder. With that much separation and a properly chosen aperture, I can easily get the dreamy background that makes the subject pop.

Learn Bird Behavior
When I first started photographing birds, I’d fire off shots at any flutter of wings—hoping to get lucky. But over time, I realized that success didn’t come from random bursts of enthusiasm. It came from observation. The more time I spent simply watching birds, the more I began to understand their patterns, preferences, and personalities.
Mastering bird photography isn’t just about gear or settings—it’s about learning the rhythm of the lives you’re photographing.
Start by Watching Without the Camera
Set your camera down. Grab a coffee or a notebook and spend time observing the birds in your yard. Pay attention to:
- Arrival times: Are they more active in the morning or evening?
- Feeding patterns: Do they visit in flocks or solo? Are there certain times when they swarm the feeder?
- Perching behavior: Which branches do they land on before or after feeding?
- Dominant vs. shy species: Who waits, and who jumps right in?
You’ll start to notice repeat behavior—specific birds landing in the same spot or following a routine flight path. This is valuable knowledge that helps you pre-focus, position your camera, and predict the moment before it happens.
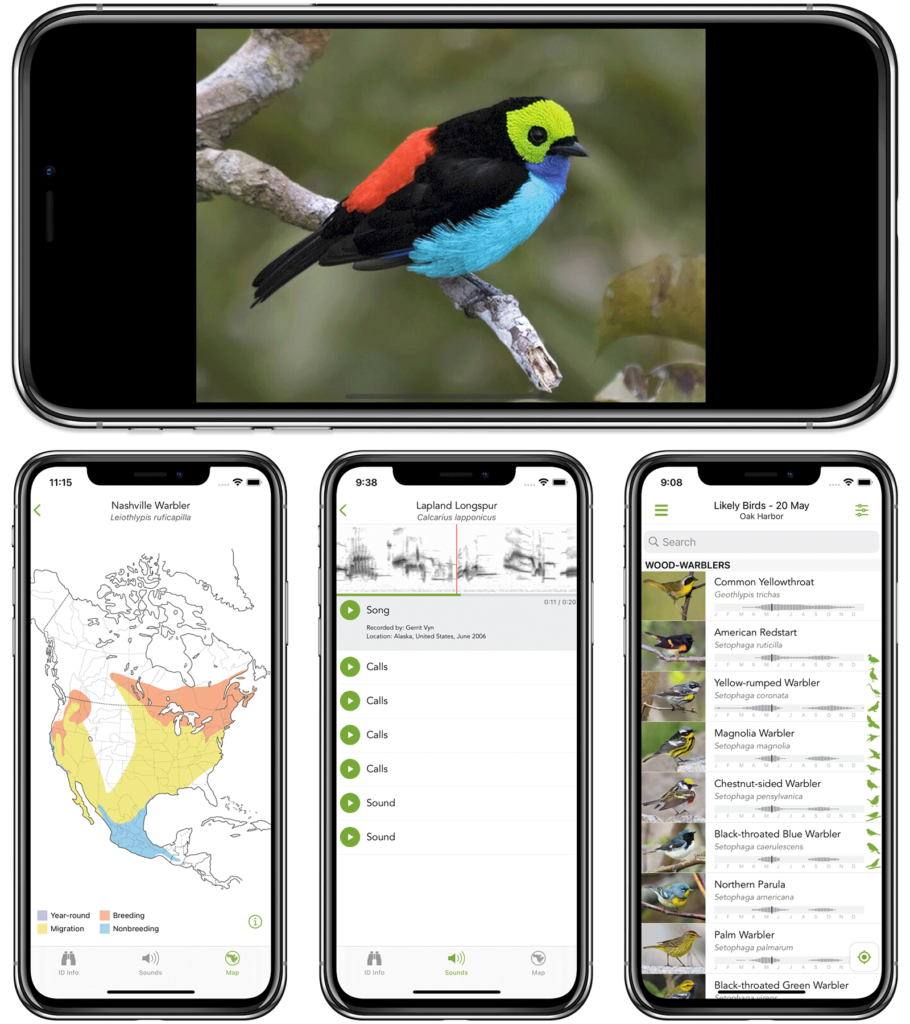
Use Field Guides and Apps to ID and Understand Birds
To truly understand behavior, you need to know what species you’re watching. Some are ground feeders, others prefer hanging feeders. Some are aggressive; others are timid and will only approach when things are quiet.
Helpful tools include:
- The Merlin Bird ID app – Offers identification help and behavior insights.
- eBird – Lets you track sightings and view what’s common in your area.
- Sibley or Peterson field guides – In-depth books on bird ID and behavior.
These tools can tell you things like:
Northern cardinals usually arrive at feeders early or late in the day and are known to be skittish. They prefer landing on low, sturdy branches before hopping down to eat.
Knowing that gives you a head start when setting up your shots.
Learn Their Sounds and Calls
Birds will often announce what they’re about to do. Alarm calls can warn you that a hawk is nearby (and your subjects are about to vanish). Courtship calls might indicate an interesting display is about to happen.
Apps like BirdNET and Song Sleuth help you identify these sounds in real time. Over time, you’ll start to associate certain calls with specific behaviors, giving you a cue to get ready.
Journal What You See
Start a backyard bird photography journal. Each day, jot down what birds visited, how they behaved, where they landed, what time they showed up, and any changes in lighting or weather. Patterns will emerge.
You might notice:
- Woodpeckers come around 9 a.m. but avoid the feeder when it’s windy.
- Finches gather on cloudy afternoons but disappear on sunny mornings.
- Jays always announce their arrival with a sharp call and scatter smaller birds.
This kind of knowledge not only makes you a better photographer—it makes you more in tune with your local wildlife.

Camera Settings That Work for Backyard Bird Photography
Getting the right camera settings is key to capturing sharp, well-exposed bird images—especially when your subject is small, fast-moving, and not the most cooperative model. Whether you’re photographing a bird in flight or one perched on a branch near your feeder, here’s a breakdown of the most effective settings to help you consistently get better results.
Shutter Speed: Freeze the Action
Birds are in constant motion—flitting, pecking, fluttering their wings. To freeze that movement and get tack-sharp images, you need to prioritize a fast shutter speed.
- For birds in flight: Start at 1/2000 sec or faster. This will help you capture details in the wings and eliminate motion blur, even when a bird takes off unexpectedly or zips past your perch.
- For perched birds: A shutter speed of 1/500 sec is usually enough, especially if the bird is relatively still. If it’s moving slightly—tilting its head or flicking its tail—bump it up to 1/1000 sec just to be safe.
Tip: If you’re using a telephoto lens, a general rule is to use a shutter speed that’s at least 1.5–2x your focal length (i.e., 1/800 for a 400mm lens) to reduce camera shake, even with stabilization.
Aperture: Balancing Sharpness and Background Blur
Your aperture choice affects both your depth of field (how much of the image is in focus) and the overall look of your image.
- A good starting range is f/5.6 to f/8. This gives you a nice blend of a sharp subject while still blurring the background, helping the bird stand out from its surroundings.
- If the bird is larger or you want more of it in focus—say the tail feathers and beak—go closer to f/8 or f/9.
- For smaller birds or portraits where you want maximum blur in the background (bokeh), try f/4 to f/5.6—just keep in mind that your focus will need to be spot on.
Tip: With smaller birds that hop around quickly, using a slightly wider aperture helps keep your shutter speed high, especially in low light.
ISO: Don’t Fear the Noise
Many beginners hesitate to push their ISO, but here’s the truth: a slightly grainy photo is far better than a blurry one.
- Start with ISO 400–800 in good light.
- In overcast or shaded conditions, don’t be afraid to bump it to ISO 1600–3200, especially if you need to maintain that fast shutter speed.
Modern cameras (even entry-level models) handle noise better than they used to, and a bit of noise can be reduced in post-processing. Motion blur? Not so much.
Tip: Turn on Auto ISO with a minimum shutter speed limit—your camera will handle ISO adjustments for you while maintaining sharp results.
Focus Mode: Precision Matters
Autofocus is your best friend when it comes to fast-moving wildlife photography.
- Use Continuous Autofocus (AI Servo on Canon / AF-C on Nikon and Sony). This tracks movement and adjusts focus as the bird moves—essential for both perched birds that might suddenly hop or fly and for those fast in-flight shots.
- Enable Eye Detection AF (if your camera supports it)—and if it has a “bird eye” or “animal eye” detection mode, even better. Many newer mirrorless systems (like the Nikon Z-series, Sony Alpha, and Canon R-series) can now lock onto a bird’s eye, giving you incredibly precise focus.
Tip: Use a single AF point or a small focus area to place the focus exactly where you want it—usually the eye.
Drive Mode: Don’t Miss the Moment
Timing is everything in bird photography. A blink, a wing flutter, or a hop can all make or break a photo. That’s where burst mode comes in.
- Set your camera to High-Speed Continuous Shooting (sometimes labeled “Burst Mode”). This allows you to take several frames per second with one press of the shutter.
- Even with a perched bird, that tiny moment when it turns its head toward you or puffs up its feathers is often fleeting—burst mode gives you a better chance of capturing it.
Tip: Use burst mode strategically. It’s tempting to fire off dozens of shots, but try to anticipate movement and time your bursts for the most expressive moments.
Bonus Tips: Fine-Tuning Your Settings for Success
- Custom Modes: If your camera allows it, save your bird photography settings to a custom shooting mode (e.g., C1 or U1). That way, you can jump straight into action without fumbling through menus.
- Exposure Compensation: Birds with white or dark plumage can trick your camera’s meter. Don’t be afraid to adjust your exposure compensation (+/-) to preserve detail in feathers.
- Use Back-Button Focus: Separating your focus from the shutter button gives you more control—especially when a bird is on a perch and not moving.
Bird photography, especially in your backyard, is all about quick reactions and adaptability. The more comfortable you become with your settings, the more instinctive it will feel—and the better your results will be.

Choosing the Right Food to Attract Birds to Your Backyard Year-Round
The type of food you offer in your backyard can make a big difference in the variety—and frequency—of feathered visitors you’ll see. Birds have seasonal dietary needs, and offering the right food at the right time not only keeps them healthy, but also gives you more chances to photograph them up close.
Let’s break it down by season, with a special focus on attracting species like warblers, finches, and hummingbirds.
Spring: Fuel the journey
Spring migration brings a wave of colorful birds, including warblers, returning from their winter homes. This is prime time to attract and photograph new visitors.
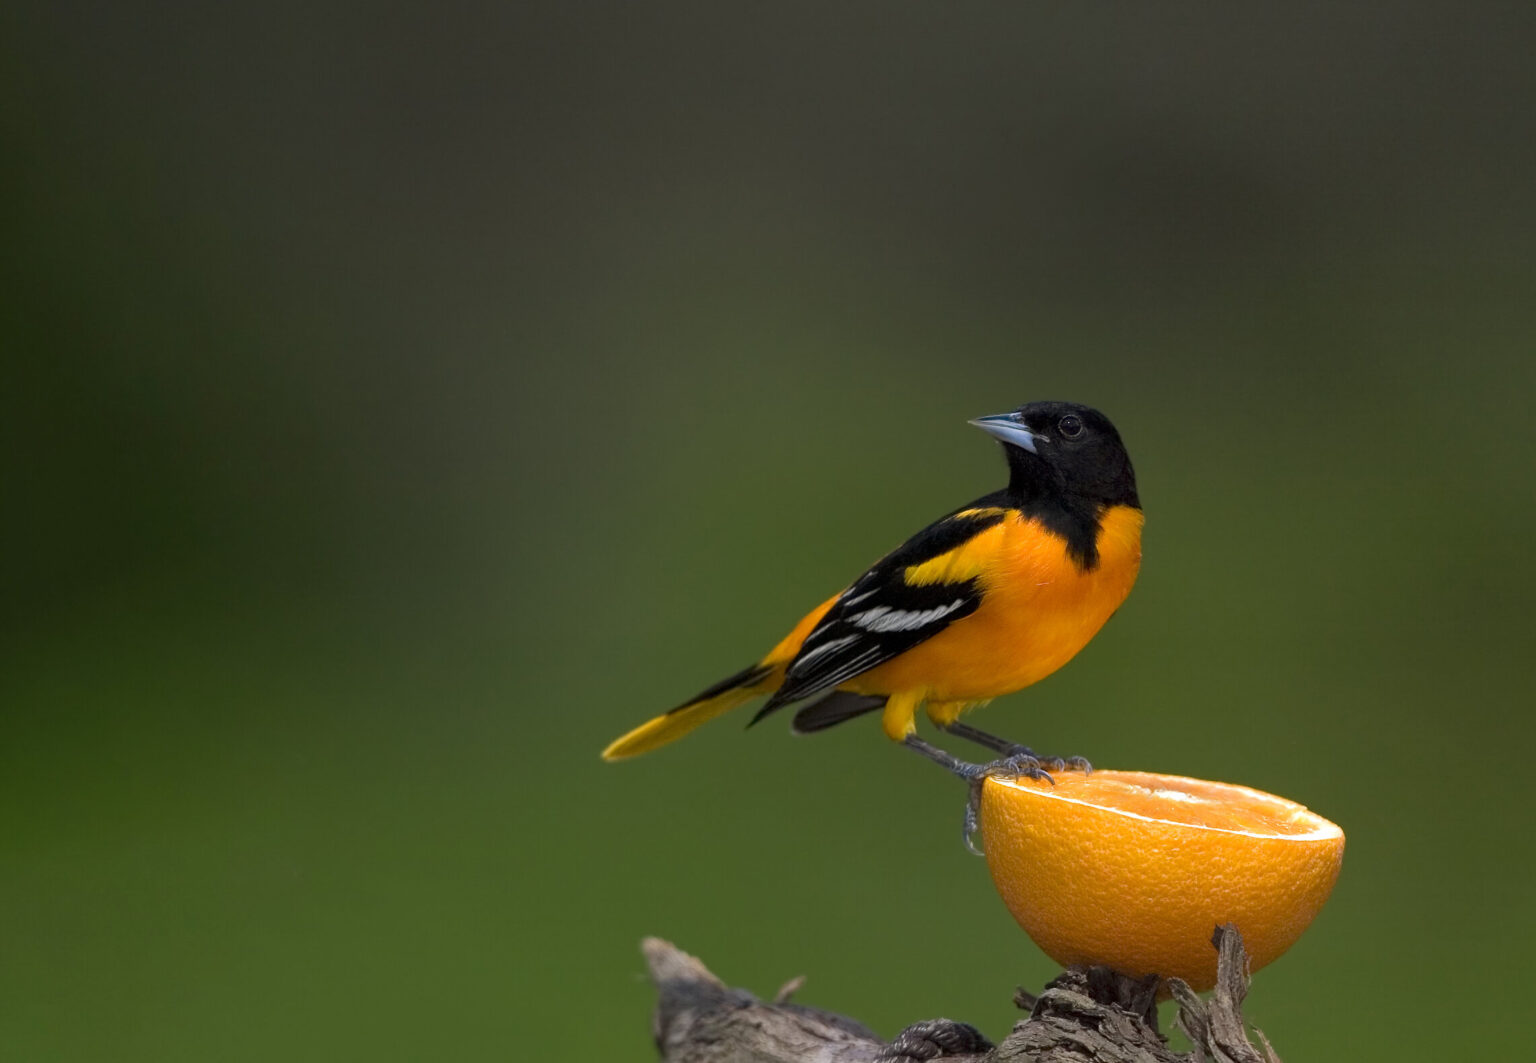
- Fruit & Natural Foods: Try setting out orange halves, sliced apples, or raisins. You can also offer baked and crushed eggshells—a natural calcium source especially appreciated by nesting females.
- Suet for Insect Lovers: Warblers love insects, but suet makes a great substitute. Smear it into tree bark, use suet cakes in wire cages, or try feeders designed specifically for suet. If you’re in a rural area like I am, you can often order suet cakes in bulk for home delivery.
- Black-oil Sunflower Seed: Some warblers will snack on this high-fat seed, especially as they pass through during migration.
- Water, Water, Water: One of the most powerful attractants for warblers is moving water. A simple birdbath works, but the sound of dripping or flowing water—like a fountain or dripper—is even more enticing.
Summer: Keep It Simple for backyard bird photography
As natural food sources increase, bird feeders may see a bit less action. Still, you can offer a few select items that keep summer favorites coming back.
- Nectar for Hummingbirds: Mix four parts water to one part sugar (no red dye needed) and keep feeders clean and shaded.
- Nyjer Seed for Finches: Goldfinches love nyjer seed, especially in tube feeders with small ports that reduce waste.
- Suet Cakes: You can continue offering suet (including vegetarian options), but keep it in the shade to prevent melting in hot weather.
Autumn: Energy for Migration
As birds prepare for long migratory journeys or begin adjusting to shorter days, their appetites ramp up. This is the time to bulk them up.
- Millet, Peanuts, and Peanut Butter: These high-energy foods attract a wide range of species, from chickadees to nuthatches.
- Suet Cakes: Still a hit in cooler temperatures and perfect for insect-eaters fueling up for migration.
Winter: High-Energy Fuel for Survival
Cold temperatures mean birds need high-fat, high-calorie foods to survive. This is also when feeders become the most vital—and busiest—for photography.
- Black-Oil Sunflower Seed: A favorite across many species. It’s rich in fat, easy to crack, and works well in most feeder styles.
- White Proso Millet: A great high-protein option, especially for sparrows and juncos.
- Peanuts: Offer shelled peanuts or peanut hearts in metal mesh tube feeders. Just make sure they’re unsalted and raw.
- Suet Cakes: Perfect for woodpeckers, chickadees, and nuthatches. Winter is also when suet lasts longer without spoiling.
- Nyjer Seed: Keep attracting finches by offering nyjer in a feeder with tiny holes to minimize spillage.
- Cracked Corn: Go for medium-grade cracked corn. Fine-grade turns to mush in snow or rain, and coarse is too large for smaller birds.
What NOT to Feed Birds: Human Foods to Avoid
While it might be tempting to toss out kitchen scraps or share bits of bread, many human foods are either unhealthy or downright dangerous for birds.
- Bread (fresh or stale): Offers no nutritional value and can grow harmful mold.
- Chocolate: Toxic to birds just like it is to pets—never offer anything with chocolate or cocoa.
- Table Scraps: These may attract rats or mice, and many aren’t safe or digestible for birds.
Feeding birds year-round is one of the easiest ways to attract them for photography—and to support their survival. Choose the right food for the season, offer fresh water, and keep your feeders clean. In return, you’ll have a front-row seat to the ever-changing variety of species visiting your yard—and endless opportunities to create beautiful images.
Composition: Beyond the Bird in the Center
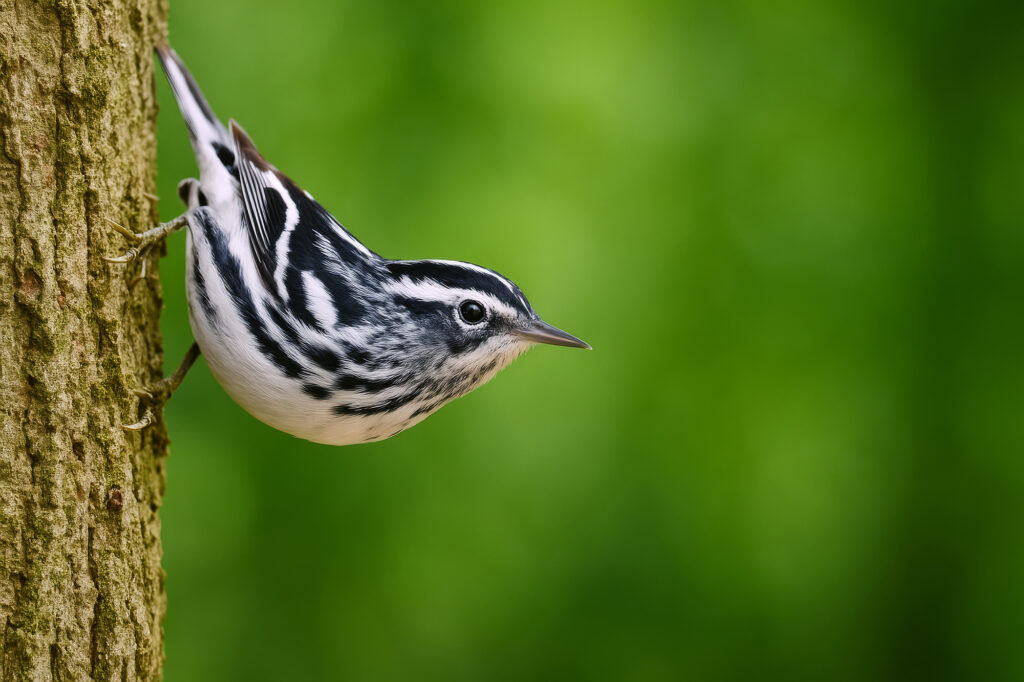
Avoid the rookie mistake of centering everything. Use the rule of thirds to add balance and interest.
Leave space in the direction the bird is looking or flying. Capture interaction with the environment—berries, blossoms, raindrops on feathers. These little elements tell a story.
I once captured a shot of a blue jay mid-squawk, its beak open wide, framed by snowy pine branches. The background told you it was winter. The expression told you the bird had something to say. That’s the kind of image that sticks.
Shooting Through Windows
Can’t go outside? No problem.
- Clean your windows.
- Shoot straight through the glass to minimize distortion.
- Turn off lights inside to reduce reflections.
- Use a lens hood or a piece of black fabric around the lens to block reflections.
- Wear dark clothing.
Some of my favorite photos were taken in pajamas through a sliding door. It’s not cheating—it’s being clever.
Post-Processing Tips For Backyard Bird Photography
You don’t need to be a Photoshop wizard.
- Crop to improve composition.
- Adjust exposure and contrast for punch.
- Sharpen lightly, especially around the eyes and beak.
- Avoid over-editing. Keep it natural.
Programs like Lightroom or free options like RawTherapee are excellent for beginners.

Mistakes to Avoid: Common Pitfalls That Can Ruin the Shot (or the Experience)
Even the most well-intentioned photographers make mistakes, especially when they’re just starting out. Backyard bird photography might seem simple, but there are a few key errors that can hinder both your results and the well-being of the birds you’re trying to capture.
Here are some of the most common missteps—and how to avoid them.
1. Getting Too Close, Too Fast
One of the quickest ways to ruin your chances of a great shot is by startling your subject.
Birds are naturally cautious, and if they sense a sudden movement or see a large figure approaching too quickly, they’ll fly off—and may not return anytime soon.
What to do instead:
- Set up your shooting position ahead of time and stay still.
- Use a telephoto lens (300mm or more) so you can shoot from a comfortable distance.
- If you’re working from a blind or behind a window, give birds time to get used to your presence.
Pro tip: Birds often return to the same perches. If you stay still and patient, they’ll come back—and you’ll be ready.
2. Using Flash
It might seem like a good idea to use a flash when lighting conditions aren’t ideal, but in bird photography, flash is almost always a bad move.
Flash can startle birds, interrupt their natural behavior, and even cause them to abandon a feeding spot. On top of that, it rarely looks natural—especially in outdoor settings—often resulting in harsh shadows and unnatural highlights.
Better alternatives:
- Use natural light—photograph in the early morning or late afternoon when the light is soft and golden.
- Bump up your ISO and use a wide aperture to compensate for lower light.
- If you’re photographing from indoors, shoot near a large window with plenty of ambient light.
3. Ignoring the Background
Even if you capture the bird in perfect focus with crisp detail, a cluttered or distracting background can ruin the entire image.
Think of your background as part of the composition—it should complement the subject, not compete with it.
Avoid:
- Fences, sheds, power lines, or any man-made structures (unless they add to the story).
- Branches or objects that appear to “poke” into or out of the bird’s head or body.
What to do instead:
- Position your feeder and perches with a clean, natural background in mind.
- Create distance between your subject and the background to produce more blur (bokeh).
- Use a wide aperture (like f/5.6 or f/4) to isolate the bird and soften the surroundings.
Bonus tip: Move your camera position a few inches left or right—you’d be amazed how much that can clean up your background.
4. Neglecting Your Bird Feeders
Dirty feeders aren’t just unsightly—they’re dangerous. Moldy seed, spoiled suet, and filthy feeders can spread harmful diseases like salmonella, avian pox, and conjunctivitis, especially when large flocks gather in one place.
To keep birds safe and healthy:
- Clean feeders with a 1:10 bleach solution every two weeks—or more often in wet weather.
- Empty out old or wet seed that’s clumped or sprouting.
- Rinse birdbaths and refresh water daily.
- Rotate feeder types and feeding locations to reduce the spread of pathogens.
Healthy birds = more visits = more photo opportunities.
5. Overediting in Post-Processing
It’s tempting to go overboard in editing—adding too much contrast, over-sharpening, or saturating colors until the image no longer looks real.
While editing is a valuable tool, subtlety is key in wildlife photography. Viewers should admire your image for its beauty and authenticity, not its special effects.
What to keep in mind:
- Use editing to enhance—not to fix poor technique.
- Focus on adjusting exposure, sharpness, and color balance gently.
- Avoid heavy cropping that reduces resolution unless it’s absolutely necessary.
6. Expecting Every Shot to Be a Winner
This one is more about mindset than technique—but it’s just as important.
Bird photography involves a lot of waiting, trial and error, and missed opportunities. Don’t get discouraged if most of your shots don’t turn out. That’s part of the process.
Even seasoned pros delete far more images than they keep.
Keep Learning, Stay Inspired
Backyard bird photography is a journey. You’ll have dry spells. You’ll delete more photos than you keep. But over time, you’ll develop an eye for detail, learn to predict behavior, and gain a deep appreciation for the wildlife around you.
Start a photo-a-day challenge. Join a local birding club. Use the Merlin Bird ID app to identify new visitors. Get your family involved—my granddaughter once sat there and named the birds that came on our property.
Final Thoughts
You don’t need to travel far to create stunning wildlife images. Some of the most memorable shots you’ll ever take could happen just a few steps from your back door.
So grab your camera, fill the feeders, and let nature come to you. Your backyard might just become your favorite photography destination.
Do you want to learn to photograph smaller birds? We run a workshop called Point Pelee Songbird Migration. Point Pelee and Rondeau Provincial Park, located at the western end of Lake Erie, sit at the confluence of two major bird migration flyways and are ideally situated to receive many birds in transit during their spring migrations. Of the 501 species known in Ontario, 314 have been recorded in this area during the migration. We have scouted this area for many years and identified the best places to spot and photograph migratory species.
Read more about experiencing the spring bird migration at Point Pelee.