Our Guide to Wildlife Photography for Beginners
By Kevin Pepper |
Wildlife photography feels mysterious when you’re new to it. Big lenses, fast-moving subjects, early wake-ups, and that constant worry that everyone else knows some secret formula you don’t.
Good news: they don’t.
Every great wildlife photographer started exactly where you are—curious, excited, and hoping everything comes together at the right moment. The truth is, most beginners think they need complex settings, perfect conditions, or the “right” gear before they can create meaningful images. But great wildlife photography isn’t born from equipment—it’s born from awareness, patience, anticipation, and a willingness to be present in the moment.
This guide is built to take the pressure off and focus on what really matters. These are the same principles we teach in the field—practical, no-nonsense, real-world habits that help you grow faster and enjoy the process more. If you’ve ever felt overwhelmed, intimidated, or unsure where to start, you’re exactly who this was written for.
At Akari Photo Tours, we’ve spent decades helping newcomers fall in love with photographing wildlife across every kind of environment—icy Antarctic beaches, dusty Namibian plains, Tanzanian savannas humming with life, and the quiet forests of North America where owls, bears, and foxes slip through the shadows. We’ve guided thousands of beginners through their first wildlife encounters, first behavioral shots, first early-morning adrenaline rushes, and first portfolio images they’re proud to show off.
What we’ve learned is simple: you don’t need to know everything to start—you just need someone who knows the path.
That’s where we come in. Our team is made up of photographers who have spent years—many of us decades—in the field. We know the rhythms of different species, the moments that matter, the subtle cues that tell you something exciting is about to happen. And we love nothing more than sharing that knowledge with someone who’s taking their first step.
We don’t just walk you into wildlife photography—we walk beside you.
We answer the questions beginners are too shy to ask.
We simplify the complicated parts so you can actually enjoy the experience.
We give you space to learn, room to experiment, and clear guidance when you need it most.
Most importantly, we create an environment where you feel supported, not judged. Where mistakes are part of the adventure, not something to hide. Where every new skill builds on the last. And where your growth as a photographer happens naturally—because you’re learning in places that inspire you.
Every workshop we run is a friendly push into a world that’s equal parts challenge, adventure, and pure joy. A world where you’re not just taking photographs… you’re experiencing wildlife in a way that leaves a mark.
If you’re curious, excited, and ready to learn, you’re already on the right path. And we’re here to help you walk it.

Gear You Actually Need (And What You Don’t)
Before you empty your savings account for a lens the size of a loaf of bread, let’s keep things simple.
What you truly need:
- A camera with solid autofocus
- A telephoto lens in the 300–500mm range
- A few fast, reliable memory cards
- 2–3 spare batteries
- A comfortable strap or harness
- A beanbag or monopod for support
What you don’t need:
- A giant 600mm f/4 on day one
- Multiple camera bodies
- A suitcase full of “maybe one day” gadgets
Master the basics first. The upgrades can come later.

Packing for Flights Without Losing Your Mind
Air travel is where photographers either become zen masters… or lose the will to live.
Long lines, tight spaces, weight limits, gate agents with unpredictable moods—traveling with camera gear can feel like a full-contact sport. But with a little planning (and a few smart habits), you can get through airports with your sanity intact and your gear safely by your side.
A few rules help:
Never gate check your camera gear.
Bags get tossed, dropped, rained on, lost, and occasionally kicked like disgruntled soccer balls. The cabin is the only safe place for your camera bodies and lenses. If someone tries to take your bag from you at the aircraft door, politely stand your ground. Explain that it contains fragile optics and cannot be checked. Nine times out of ten, they’ll let you bring it aboard.
Wear your heaviest items.
Does a 600mm lens make for questionable airport fashion? Absolutely. But airlines weigh bags—not jackets, vests, or pockets. Wear the heaviest coat, boots, and even your camera strap if it saves weight in your backpack. Many pros even travel with a photo vest or fishing vest loaded with batteries, chargers, and lenses. It looks absurd. It works beautifully.
Use a backpack that fits international carry-on limits.
This is critical. International airlines often have stricter carry-on dimensions than North American carriers. A well-designed camera backpack—nothing oversized, nothing rigid—fits under seats, slides into overhead bins easily, and doesn’t raise eyebrows. Flight attendants are much more accommodating when your bag doesn’t look like it’s about to steamroll the beverage cart.
Bonus: a softer backpack compresses better if an overhead bin gets crowded.
Pack smart inside the bag.
Keep gear tight and organized:
- Camera bodies in the center
- Lenses padded and snug
- Heaviest items low for stability
- Batteries and chargers accessible for security checks
Security officers appreciate quick organization, and you’ll breeze through checkpoints without unpacking half your life.
Carry a small foldable tote.
This is the photographer’s secret weapon.
If a gate agent tells you your bag is overweight, unzip it, remove a lens or body, drop it into the foldable tote, sling it over your shoulder, and—suddenly—your main bag is compliant. No drama. No stress. No fees.
Totes also help when:
- You buy snacks or water
- Your jacket becomes too warm
- You need quick access to gloves, hat, or headphones
They weigh almost nothing and solve dozens of problems.
Add a few more pro travel tips:
Keep batteries in your carry-on.
Lithium batteries are not allowed in checked luggage, and security will pull you aside if they find them. Store batteries in the cabin, terminals covered or individually sleeved.
Use cable ties or Velcro straps to secure zippers.
This keeps pockets from opening accidentally when overhead bins get jostled.
Back up your images before flights.
Airports are where laptop bags get accidentally dropped, stepped on, or “borrowed.” Always have copies on both your cards and a separate SSD.
Have a printed list of your gear.
Customs agents sometimes ask. And if your bag is ever lost (rare, but possible), you have documentation ready.
Travel with a smile and patience.
Airport staff deal with countless stressed travelers. Being kind, patient, and understanding goes a long way—especially when you need a favor.
Following these habits turns air travel from a stress test into just another smooth part of your photography journey. And once you’ve done it a few times, the whole routine feels automatic—leaving you more energy for the exciting part: the wildlife waiting for you on the other side of the world.

Managing Cards, Batteries & Backups
Great photos mean nothing if you lose them before lunch.
Ask any seasoned wildlife photographer and they’ll tell you the same thing: your images don’t exist until they exist in more than one place. Every one of us has a story about a corrupted card, an unexpected rainstorm, a hard drive failure, or a battery drain at the worst possible moment. These are not “if” situations—they’re “when” situations.
The good news? Preventing disaster is unbelievably simple once you build a routine.
Here are the professional habits that keep your images safe, organized, and ready for editing long after the trip is over.
Use Multiple 128GB (or Similar) Cards Instead of One Giant Card
Beginners often fall in love with the idea of using one huge memory card for the entire trip. It feels clean and convenient… until the inevitable happens.
Cards fail.
Cameras glitch.
You accidentally hit format.
You drop a card into a crevasse (yes, it happens).
Using several mid-sized cards spreads your risk. If one goes bad, you lose part of a day—not the entire workshop.
Why 128GB? Because it’s the sweet spot: large enough for a full day of shooting RAW wildlife images, small enough that you’re not putting your whole trip on one card.
Pros also label their cards clearly:
- Morning / Afternoon
- Day 1 / Day 2 / Day 3
- A / B / C cards for rotation
Organization is your friend when things get busy in the field.
Format Your Cards Every Morning
Formatting a card isn’t the same as deleting images.
Formatting gives the card a clean slate and reduces the chance of file structure corruption. It also means you start each day knowing:
- The card is empty
- It’s functioning properly
- Your images from yesterday are safely backed up
Professionals never shoot on a half-full card from yesterday. The risk isn’t worth it.
Quick tip: format in-camera, not on your computer.
Each camera builds its own file structure. Let it do the job properly.
Back Up Your Photos Daily—Twice
This is non-negotiable.
At the end of every day, you should have your images in at least two places:
- Your laptop or portable SSD
- Your memory cards
One is your working copy.
The other is your insurance policy.
Seasoned photographers back up in layers:
- Import everything into Lightroom or Photo Mechanic
- Copy the RAW folder structure to a second SSD
- Do NOT erase the card until the next morning
If your laptop dies, you still have your cards.
If a card goes bad, you still have your laptop.
If your bag gets wet, one backup may survive in a separate case.
The trifecta of safety:
- Two external SSDs
- Memory cards
- Cloud backup when possible (hotel Wi-Fi permitting)
This might seem excessive… right up until the moment it saves an entire trip.
Keep Batteries Warm in the Cold
Cold kills batteries faster than bad settings do.
In the Arctic, Antarctica, Yellowstone in winter, or even on a chilly morning in Newfoundland:
- Batteries drain twice as fast
- Voltage drops cause sudden “empty” readings
- Performance tanks when fingers freeze
Professionals store spare batteries:
- Inside inner jacket pockets
- Wrapped in a buff or thin glove liner
- In a small insulated pouch
Warm batteries last longer, recycle faster, and keep your camera functioning when it matters most.
A trick many pros use:
Rotate batteries like a hockey line.
The warm one goes in the camera, the cold one gets warmed in your pocket, and the next one waits in reserve.
Charge Everything Every Night—Zero Exceptions
Wildlife photography days start early—sometimes 4:30 AM early—and end late. You do not want to wake up scrambling for a half-charged battery or remembering you forgot to plug in your SSD.
Each night, charge:
- All camera batteries
- All external SSDs (if applicable)
- Drone batteries (if traveling with one)
- Your laptop
- Your phone (trip logistics!)
- Your headlamp (night photography, power outages, or lodge walkways)
Professionals also pack:
- A multi-port charger
- A universal travel adapter
- Extra charging cables
Nothing derails a morning faster than hunting for a USB cable in the dark.
A Routine That Saves You—Every Single Time
The beauty of this system is that once you follow it for a couple of days, it becomes muscle memory:
- Dump cards
- Back up images
- Charge batteries
- Clear cards
- Pack clean and ready for morning
Not glamorous. Not exciting. But absolutely essential.
And when that once-in-a-lifetime moment happens—a cheetah sprint, a bear fishing, a puffin returning with a beak full of sand eels, or a penguin rocket-launching onto shore—your camera will be ready.
Your cards will be ready. And your images will survive long after the adrenaline fades.
This routine doesn’t just “save heartbreak later.” It protects the memories and moments you’ve worked hard to create.
How to Think Like a Photographer, Not a Tourist
Tourists move quickly. Photographers slow down.
It’s one of the biggest differences you notice in the field. Tourists are on a schedule—they march from one highlight to the next like they’re checking items off a grocery list. Photographers, though… we linger. We wait. We let the moment breathe a little.
We also stay quiet. Not just in volume, but in presence. Wildlife responds to energy, and there’s something almost magnetic that happens when you ease into a scene instead of barging into it. The animals settle. The landscape settles. And suddenly your heart rate drops just enough to notice things other people blow right past.
Photographers watch the light, not the clock. When the sun hangs low and paints everything gold, we don’t care if lunch was supposed to start ten minutes ago. We care that an elephant herd is beginning to move across the plain and the dust is turning to fire behind them. The clock becomes irrelevant. The light decides everything.
We look behind us instead of only ahead. Some of the best moments in wildlife photography happen 180 degrees from the action—an unexpected silhouette, a curious bird, a glow you would’ve missed had you stayed glued to the main event.
And we wait for moments instead of chasing them.
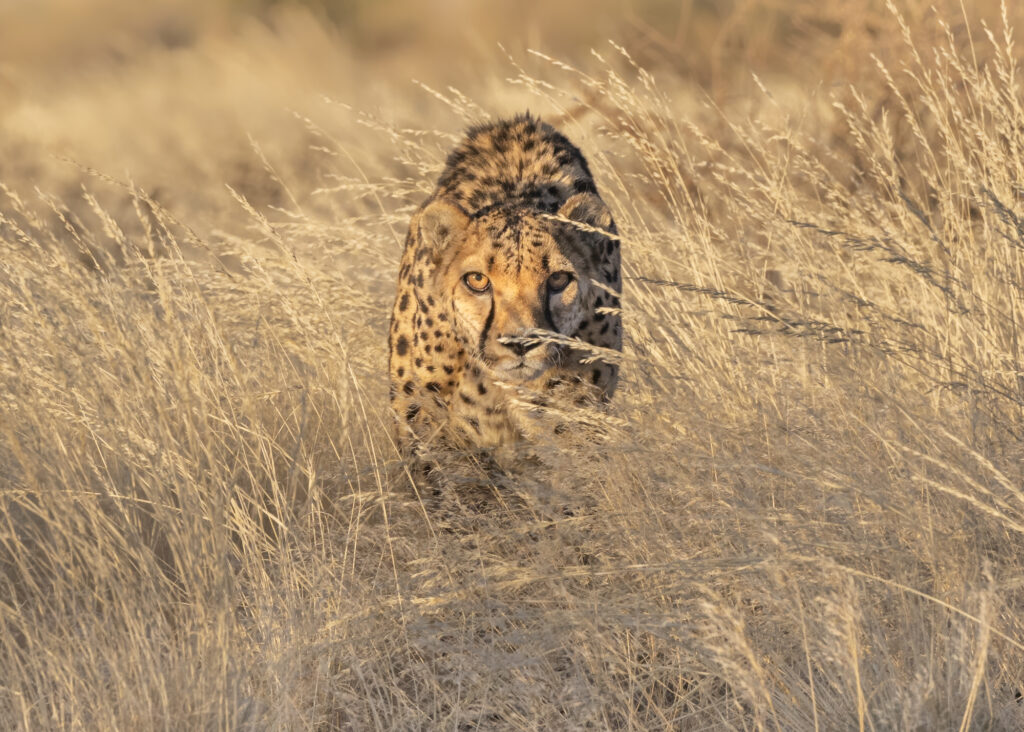
One of my favourite memories comes from a morning in Namibia. Everyone had their lenses trained on a distant lioness—staring, hoping, adjusting settings every twenty seconds. Meanwhile, I noticed a Cheetah trotting behind the vehicles, barely getting a glance from the crowd. Something in its gait felt purposeful, so I got everyone to turn and follow it instead.
Two minutes later, it stopped, looked over its shoulder, and let out a call that echoed across the pan. The light framed its breath in the cold air, and there it was—the real moment of the morning, unfolding quietly while everyone else was laser-focused on the “main” subject that never moved. Another Cheetah appears out of the tall grass. Perfect lighting… its gaze directed towards us. Walking with intent.
With a little patience, the world reveals things most people walk right past. The magic is never in the rush—it’s in the stillness, the quiet, and the willingness to let a story unfold on its own time.

Why Communicating With Your Photography Guides Matters
Communicating with your guides is one of the most underrated parts of wildlife photography. Most beginners assume the guide simply drives, spots animals, and gets everyone close enough for a photo. But guides—and especially photo guides—do so much more than that. They’re the bridge between you and the natural world you’re trying to photograph.
When you tell a guide what excites you, what intimidates you, and what you’re hoping to accomplish, everything changes. They can position the vehicle differently. They can anticipate behavior based on what you want, not what the group assumes. They can stay longer at a sighting, leave sooner for better light elsewhere, or shift focus entirely if an opportunity fits your vision.
For example, if you quietly mention that you’ve always dreamed of a backlit lion shot—dust swirling, mane glowing—your guide can immediately start planning routes and timing to match that kind of light. If you tell them you struggle with birds in flight, they’ll find locations where the angles and backgrounds make learning easier. If you explain that you love portraits more than action, they’ll position you so the backgrounds are clean, the eyes are bright, and the light hits perfectly.
Without communicating that, you’re leaving half of your potential images on the table.
This is where Akari’s approach really shines.
Our teams don’t guess what you want—we ask. We encourage open conversations from the moment the trip starts. We want to know:
- What kinds of images inspire you
- What species make your heart beat a little faster
- What scares you (yes, that matters)
- What techniques confuse you
- What you hope your portfolio will look like after the trip
When you share those things, your guides can tailor every day to your goals. And because Akari groups are small, these conversations don’t get lost in the shuffle. They’re the foundation of the experience.
We like to say that your shot comes before ours, and communication is the reason we can honour that. If someone is struggling with exposure, we slow down. If someone wants to nail the eye-level perspective, we adjust our positions. If someone quietly mentions they’ve never photographed a certain species, we remember that—and we make it a mission.
One of my favourite moments happened in Mongolia when a guest casually mentioned she had never captured a “connection shot”—that intimate moment between a human and an animal. She thought it was a silly comment, something small in the grand scheme of a workshop. But our local guide and I took it seriously.
The next morning, we positioned the group quietly near an eagle hunter as he was working with his eagle. The light hit just right, the eagle turned toward him, flew towards him, and they locked eyes for half a second. That guest got the image she’d dreamed of—because she communicated it, and we listened.
This is why communication matters. Not because you’re demanding or picky, but because photography is personal. What excites one person might not matter to someone else. The better your guides understand you, the better they can help you find those moments that stay with you long after the trip is over.
At Akari, we don’t just teach photography—we build relationships on trust, teamwork, and open dialogue. Tell us what you want. Tell us what you struggle with. Tell us what your dream photo looks like.
We’ll help you get there.

How to Approach Wildlife Without Ruining the Shot
This is the part of wildlife photography that separates respectful photographers from pushy ones—and it’s where beginners unintentionally get into trouble. Approach can make or break not only your image, but also the animal’s safety and comfort. A stressed animal won’t behave naturally, won’t hold still, and definitely won’t give you the kind of moment you’re hoping for.
Here’s how to approach ethically, safely, and in a way that leads to better photographs.
Move Slowly and Predictably
Wild animals notice patterns long before they notice details. It’s not about being silent—it’s about moving in a way that doesn’t surprise them. Slow, steady steps and predictable motion help the animal understand you’re not a threat. Quick movements—lunging forward, sudden crouching, raising your lens abruptly—will push most wildlife off instantly.
Think smooth, not sneaky.
Avoid Rushing or Making Sudden Movements
Rushing triggers instinct.
Every species has a sense of “flight distance”—the invisible bubble around them. If you break it too quickly, the animal reacts before you get your camera to your eye. This is why sprinting toward a scene or fast-walking into position almost never pays off.
Even if you think the animal is distracted, don’t assume you can hurry. Wildlife senses are far sharper than our own.
Watch the Animal’s Body Language
Body language is your early-warning system. If you read it well, you’ll know when to keep approaching and when to stop.
Signs of curiosity:
- Ears forward
- Slow, steady breathing
- Occasional glances, but no retreat
- Relaxed posture
Signs of discomfort:
- Ears flattening
- Animal turning its body away
- Repeatedly looking over its shoulder
- Quick shallow breaths
- Tail flicking (in some mammals and birds)
- Sudden stillness or freezing
If you see signs of irritation, you’re too close—even if your camera says otherwise.
Give Wildlife More Space Than You Think You Need
Most beginners underestimate space. They think, “If I’m still and quiet, I can get closer.”
The opposite is usually true.
More distance means:
- More natural behavior
- Better expressions
- Better chances of action
- Better safety for you and the animal
And with longer lenses and higher-resolution cameras, you don’t need to be right on top of the subject. Backing up a few meters often turns stressful wildlife into calm wildlife—and calm wildlife gives you infinitely better images.
Back Off at the First Sign of Discomfort
Once an animal starts showing subtle signs of unease, stop immediately. If the behavior continues or escalates, slowly back away or lower your profile.
Backing off can actually bring the animal closer in the long run—because it learns you’re not a threat. The most patient photographers often end up with the closest encounters simply because the wildlife chose to approach them.
Backing away isn’t losing the shot.
Backing away is how you earn the right to take more shots safely and ethically.
The Payoff: Better Photos, Better Behavior, Better Experiences
Approaching responsibly gives you:
- Natural, unforced behavior
- Better eye contact
- Relaxed poses and expressions
- Cleaner compositions
- More time with the subject
- And far better photographic opportunities
Wildlife that feels safe acts naturally. Wildlife that feels unsafe disappears—or worse.
When you move with intention, patience, and respect, the animals reward you with the kind of moments that make wildlife photography unforgettable.
Reading Animal Behavior for Better Photos
Want the biggest upgrade to your photography?
Learn to read behavior.If you want the single biggest upgrade to your wildlife photography—bigger than any lens, any camera body, or any new burst mode—learn to read behavior.
It’s the difference between reacting to a moment and anticipating it. Professionals don’t get lucky. We get ready.
Every species has its own tells—little cues that signal what’s about to unfold. When you learn to read those cues, you’re not guessing anymore. You’re waiting with purpose.
Predators: The Art of the Pre-Action Ritual
Predators almost never just “suddenly” do something. They prepare.
- Lions yawn before they stand up.
That huge, jaw-cracking yawn isn’t boredom—it’s an oxygen reset. When a lion yawns twice, you can bet your shutter speed that movement is coming. - Cheetahs flick their tails before they run.
That twitching tail is pure tension building. You can see the body coil, the gaze lock, the shoulders drop. That’s your cue to get ready for burst mode. - Wolves stretch before moving or hunting.
A stretch can signal the end of resting behavior and the beginning of travel or a group interaction.
Knowing these patterns means you’re already composing your shot while the beginner next to you is still wondering why everyone’s getting excited.
Birds: Masters of Micro-Body Language
Birds are incredibly expressive if you know what to look for.
- Leaning forward = imminent takeoff.
There’s a tiny pause—a fraction of a breath—where their weight shifts. Once you learn that, you’ll know to press halfway down and wait for the wings. - Wing fluttering or feather fluffing means activity is coming.
It’s often a reset: preening, repositioning, or preparing to fly. - Repeated calling signals tension, warning, or movement.
A chorus of alarms in the bush is often a sign a predator is near—or a raptor overhead.
If you learn these micro-moments, you’ll start catching takeoffs, landings, and mid-air poses that feel impossible to time without this knowledge.
Herbivores: The Rhythm of the Herd
Herbivores are subtle but predictable.
- They follow the lead of the dominant individual.
That one matriarch, that one stallion, or that one lead bull decides where the herd goes. - Ears are everything.
Forward ears = interest.
Backward ears = irritation.
One ear locked on you = awareness. - Tension in the shoulders means readiness.
Especially in animals like zebras, antelope, musk ox, and bison.
Watch the leader, not the masses—and you’ll see movement before it happens.
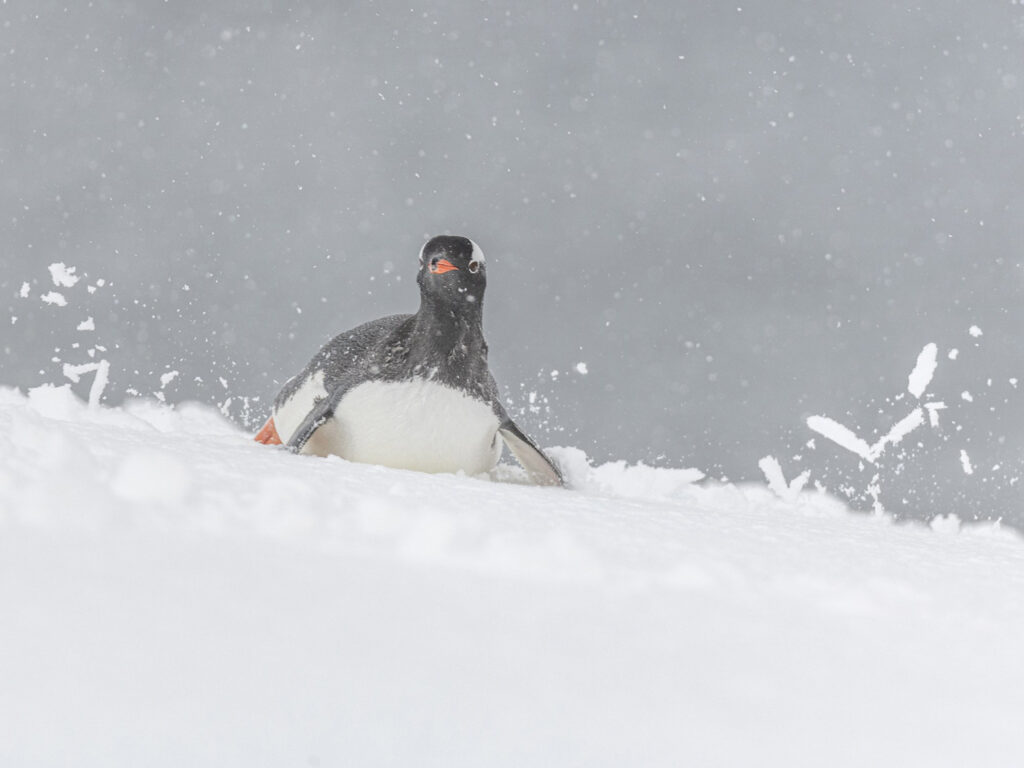
An Antarctic Lesson: The Penguin That Surfed Right Toward Us
One of the clearest examples of behavior-led photography happened in Antarctica. We were photographing gentoo penguins walking down a hill towards the surf. Beginners often assume penguins simply walk everywhere. But with enough time in the field, you learn their little shortcuts—the behaviors that reveal the “why” behind their movement.
Gentoo penguins love to body surf back down hills. It’s faster, easier, and frankly, more fun for them. But here’s the trick: they always look for the right area and the right angle before committing. Their heads tilt a certain way. Their posture changes. Their flippers stiffen just a bit.
On this particular day, the others in the group were focused on some penguins waddling along the rocks. But a few of us who had seen this before noticed a single penguin lingering on the hill, scanning the surf, rocking gently as if it was looking for a route. That subtle motion—a tiny forward lean combined with a quick glance toward the beach—was the signal.
We quietly shifted position, got down low in the area it was looking, made sur eour backgrounds were clean, and waited.
Sure enough, like a feathered torpedo, it dove forward and belly-surfed down the slope, and came skidding right toward us like it had booked the landing in advance. Everyone else turned too late. We already had the shot.
That moment didn’t happen because of luck. It happened because of behavior.
The Payoff: Anticipation Over Reaction
Once you start reading these patterns, everything changes:
- Your timing improves
- Your compositions get stronger
- You catch action others miss
- Your images feel intentional, not accidental
- Your keeper rate skyrockets
You stop reacting to what the animal just did, and start preparing for what it’s about to do.
That’s the skill that takes you from beginner to photographer.
Read our blog post on using anticipation of animal behavior to take better wildlife photos.

Light, Wind, and Perspective in the Wild
These three elements—light, wind, and perspective—are the quiet forces that separate average wildlife photos from the ones that stop you in your tracks. Every seasoned wildlife photographer becomes a student of these variables, because animals respond to them, landscapes are shaped by them, and your camera absolutely depends on them.
When you learn to read these elements as clearly as you read your histogram, your photography takes a dramatic leap forward.
Light: The Composer of Every Wildlife Image
Photographers obsess over lenses. Wildlife obsesses over survival.
Light is where those two worlds meet.
Golden Hours (sunrise + sunset):
This is when everything softens. Contrast drops. Colors deepen. Shadows stretch. The world feels like it’s exhaling.
Golden hour does three things beautifully:
- It sculpts muscle tone and feather texture
- It smooths harsh fur patterns
- It creates clean catchlights in the eyes
This is why predators often look their best in the early morning—your autofocus grabs quicker, colors stay rich, and the whole scene feels cinematic.
Midday Light:
Most people avoid this light entirely, but wildlife photographers don’t have that luxury. Animals move when they want to move—not when the sun behaves.
Midday light:
- Works beautifully for high-key images—clean, bright, airy portraits
- Enhances dust trails during action scenes
- Creates stark, graphic shadows
Cheetahs on white sand, caribou on snowpack, puffins on overcast cliffs—midday can be your friend when you lean into it.
Backlight:
Backlighting is the secret weapon of dramatic wildlife photography.
It reveals:
- Breath in cold air
- Flying dust
- Mane fur
- Feather edges
- Silhouettes with glowing halos
It’s unpredictable, but when it hits, it transforms an ordinary moment into art.
That’s why guides position you with the sun behind the subject whenever it’s safe and possible. Animals glow. Scenes sparkle. And images gain a depth you can’t fake in post-processing.
Wind: Nature’s Silent Director
Wind shapes everything in the wild—movement, behavior, direction, even emotion in an image.
Animals Face Into the Wind:
It’s instinct. Facing the wind lets them smell danger and identify approaching predators or rivals.
This means:
- If the wind changes, the animal’s posture often changes
- If the wind picks up, ears perk and alertness heightens
- If you want a head-on portrait, position yourself upwind when possible
Birds Launch Into the Wind:
Every bird, from penguins to eagles, uses headwinds for lift.
If you know wind direction, you know:
- Where birds will take off
- Where they’ll land
- Which angle will give you the cleanest flight shots
It’s not guessing—it’s physics.
Predators Hunt With the Wind in Their Favor:
Lions circle downwind so their scent doesn’t carry. Wolves adjust their approach. Foxes recalibrate constantly.
When you understand wind, you’re prepared for action before it happens.
A simple gust can tell you:
- Whether a hunt is about to begin
- Whether a herd is about to bolt
- Whether a bird is about to take to the sky
This is the kind of awareness that separates beginners from field pros.
Perspective: The Fastest Way to Transform Your Wildlife Images
Most beginners stand at full height and shoot whatever is in front of them.
Pros don’t.
Eye-Level:
This is the intimate angle—the one that feels like you’re part of the scene instead of observing it from the outside.
Eye-level does three things:
- Creates connection
- Improves background separation
- Makes your subject feel “seen”
A low position with bears, foxes, or antelope brings powerful storytelling to your frame.
Low Angles:
Low angles add drama, scale, and visual power.
Shooting from ground level (or as low as safety allows):
- Compresses foreground
- Blurs distractions
- Amplifies size and presence
- Places the viewer right in the moment
This is why many wildlife pros lie flat on the ground, kneel behind a beanbag, or shoot from a low vehicle door.
High Angles:
This is where you create context—land, water, herd structure, habitat.
High angles are great for:
- Penguin colonies
- Elephant herds
- Moose in marshes
- Dramatic aerial textures
- Migrating wildlife
A high perspective tells the story of the environment, not just the subject.
The Small Adjustments That Change Everything
Wildlife photography isn’t always about sweeping movements or dramatic repositioning. Often the difference between a “nice shot” and a portfolio piece is:
- Moving three steps left
- Dropping your knees by six inches
- Shifting to catch a backlit rim
- Reading the wind and waiting on the right side of the trail
- Anticipating where the animal will turn its head
This is the quiet craft of wildlife photography—the little decisions that, compounded over time, separate snapshots from photographs that feel alive.
At Akari, this is exactly what we teach in the field:
How to see what others miss.
How to read what’s coming next.
How to use the elements—not fight them.
And once you master light, wind, and perspective, you’re no longer hoping for a great photo—you’re setting yourself up to make one.
Read our blog post on how light can elevate your wildlife photography.
Common Beginner Mistakes (And How to Fix Them)
It’s normal to struggle early on. Here’s how to avoid the classic errors:
- Use a fast shutter speed—start at 1/1000
- Switch to continuous autofocus
- Watch your background before pressing the shutter
- Add exposure compensation when photographing dark animals
- Keep shooting during action—review later
- Don’t quit too early… wildlife rewards patience
Each small improvement adds up fast. You should sign up for our newsletter and get a free copy of our eBook, Wildlife Photography—Five Key Elements for Success.
Final Thoughts
Wildlife photography isn’t about the fanciest gear or perfect technical mastery. It’s about respect, curiosity, patience, and those small, electric moments when the wild lets you in.
If you’re ready to take the next step—whether it’s photographing puffins in Newfoundland, lions in Tanzania, or elephants in Namibia—we’re here to help you grow, learn, and create images you’ll be proud of.
This is just the beginning. Our wildlife workshops are your next step.